AbiJBailey
  • Blog
  • About Me
  • Twitter
  • Instagram
  • Nail Instagram
  • Pinterest

Ciaté 'Mini Mani Month' Advent Calendar

24/1/2016

0 Comments

 
Hello Everyone!
Happy Sunday!
As mentioned in last week's post about the Smashbox Try It Kit Best Sellers (here), today's post is about the Ciaté  'Mini Mani Month' Advent Calendar.
Although it was intended to be used as an Advent Calendar, I received it as a Christmas present and it is absolutely wonderful.  I've been opening a door each day in January instead!
​
Ciaté 'Mini Mani Month' Advent Calendar
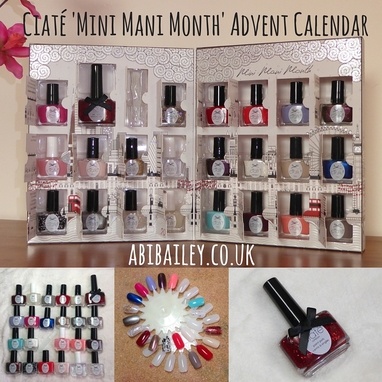
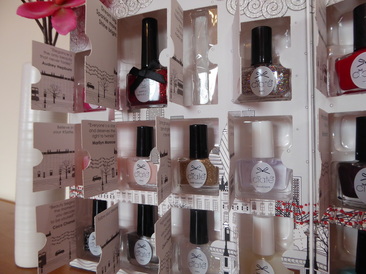
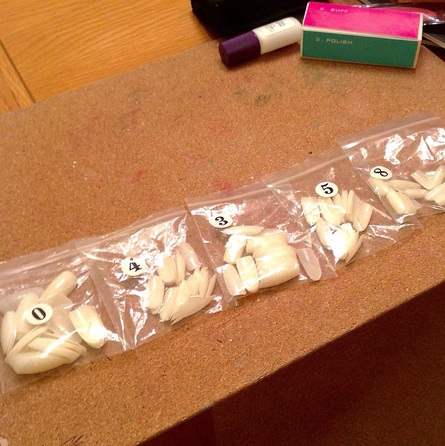
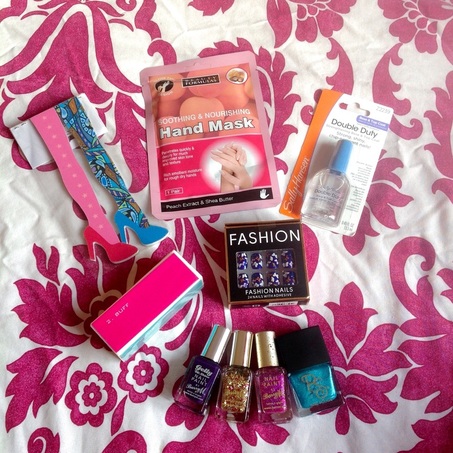
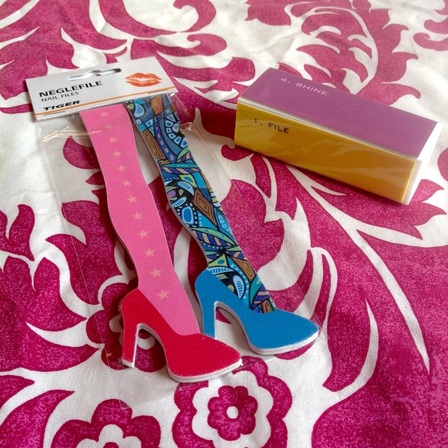
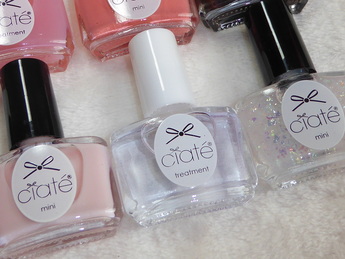
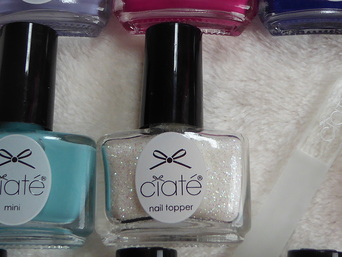
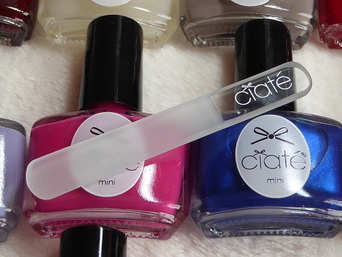
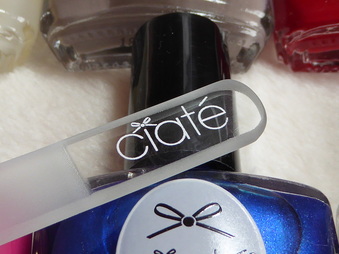
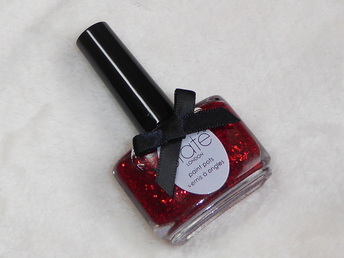
As you open each door, you reveal either a mini nail varnish, a mini nail treatment, or a mini nail topper. On day nine I got a little glass nail file and on  the 24th you get a full sized  nail varnish.
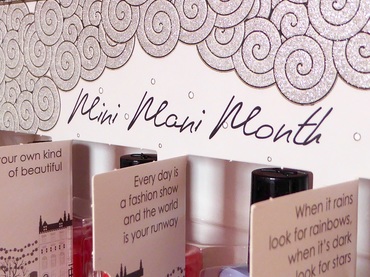
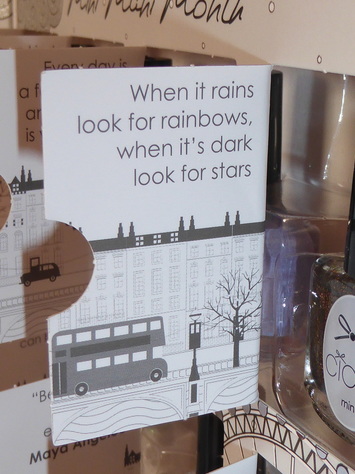
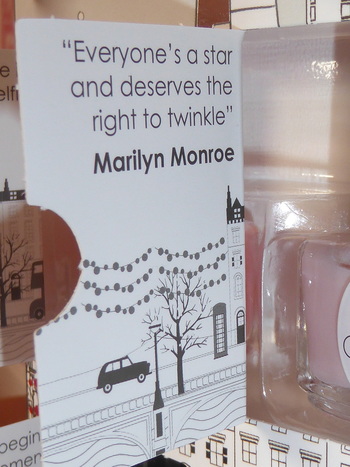
Each door has a lovely quote on it too.

Ciaté 'Mini Mani Month' Advent Calendar
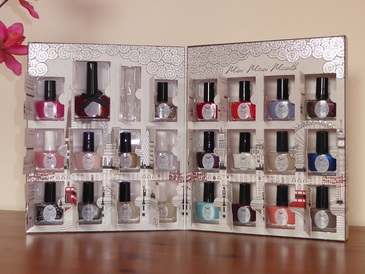
In total, you get 17 mini nail varnishes,  3 nail treatments, 2 nail toppers, 1 mini glass nail file and 1 full size nail varnish.
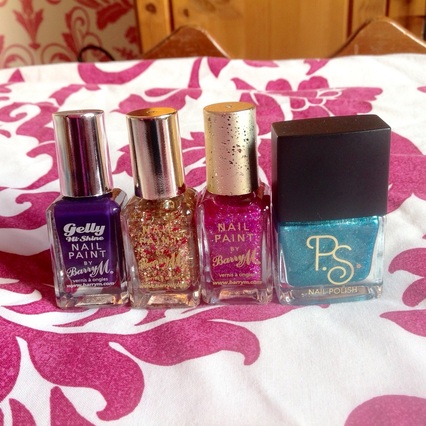
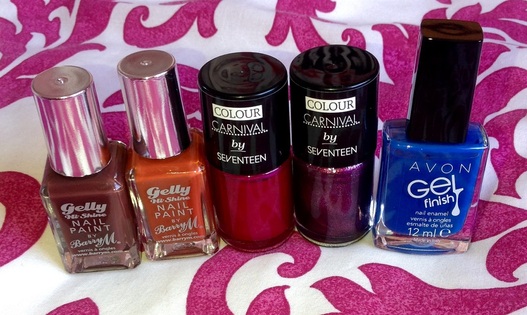
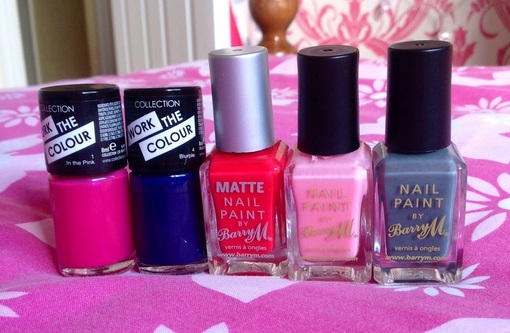
There's certainly a nail colour to suit everyone whether you like neutrals, brights, sparkly or metallic - Ciaté has you covered!
Ciaté 'Mini Mani Month' Advent Calendar
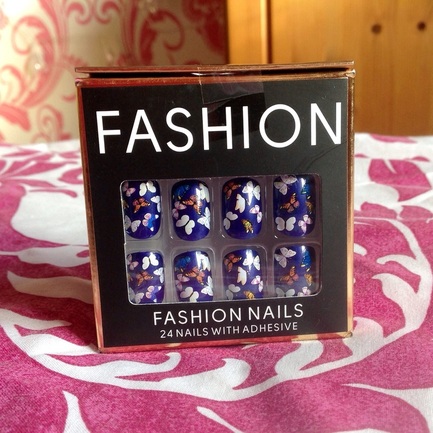
I love that they've given each item a cute name! There's nothing worse than a lipstick or nail varnish with just a number and not a clever name!
Ciaté 'Mini Mani Month' Advent Calendar
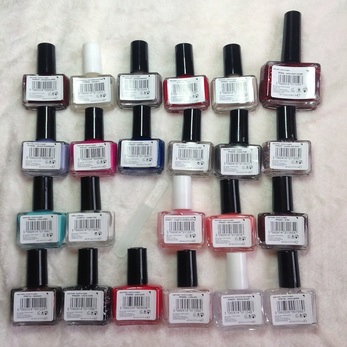
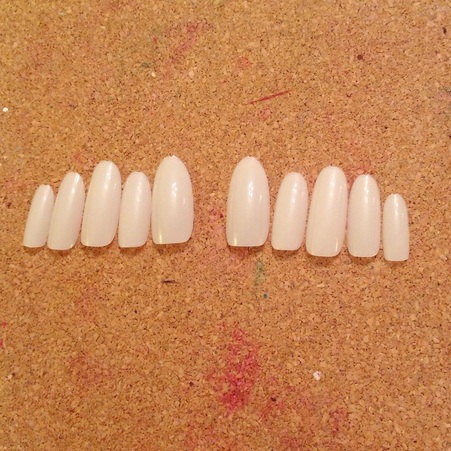
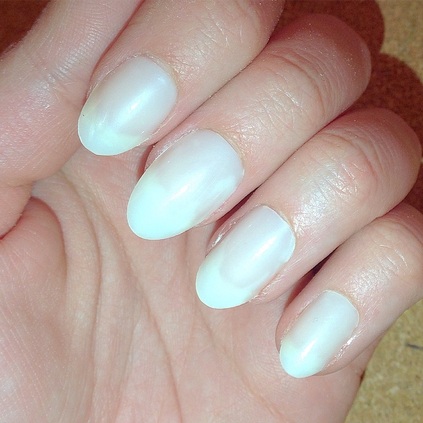
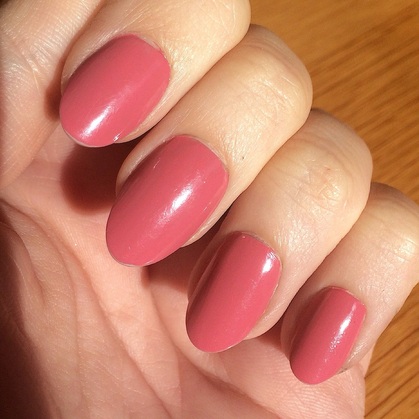
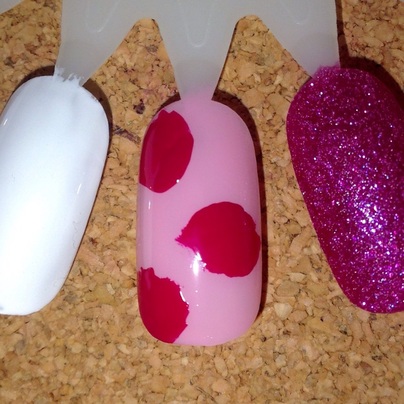
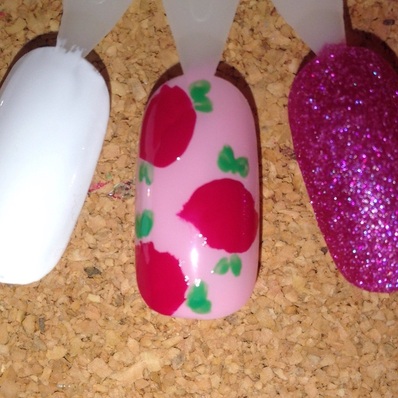
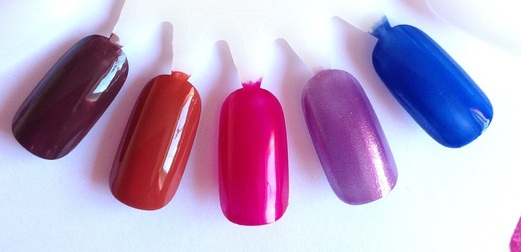
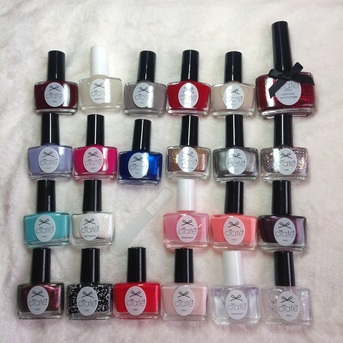
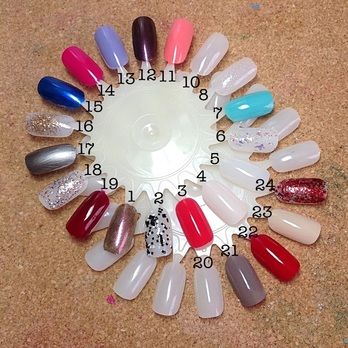
Here are the swatches!
​The names of each one are listed below - there's no number 9 as it was the  nail file that day.
Ciaté 'Mini Mani Month' Advent Calendar
Here's the run down of what you get each day:
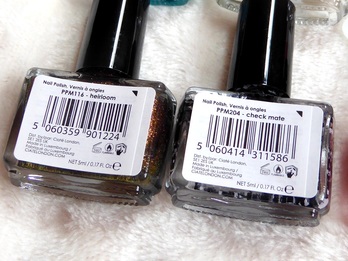
Day 1- Mini Nail  Varnish "Heirloom"
Day 2 - Mini Nail Varnish  "Check Mate"
Day 3 - Mini Nail Varnish "Pom Pom"
Day 4 - Mini Nail Varnish "Cutie Pie"
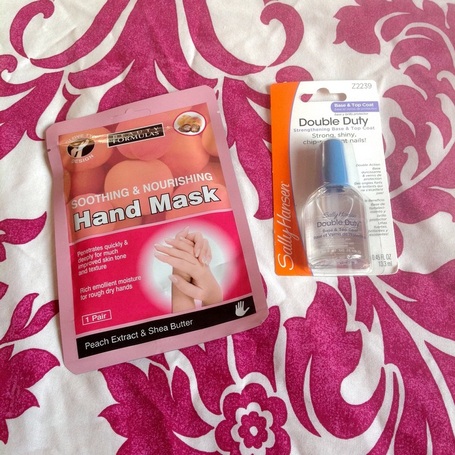
Day 5 - Mini Nail Treatment; Nail Illuminator "Bloom Boost"
Day 6 - Mini Nail Varnish "Snow Globe"
Day 7- Mini Nail Varnish "Ahoy Sailor"
Day 8 - Mini Nail Topper "Chalet Chic" (iridescent white glitter) 
Day 9 -  Mini Glass Nail File
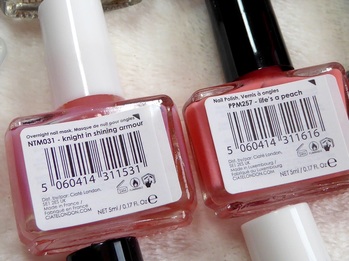
Day 10 - Mini Nail Treatment; Overnight Nail Mask "Knight in Shining Armour" 
Day 11 - Mini Nail Varnish "Life's a Peach"
Day 12 - Mini Nail Varnish "A List"
Day 13 - Mini Nail Varnish "Double Bubblegum"
Day 14 - Mini Nail Varnish "Raspberry Collins"
Day 15 - Mini Nail Varnish "Birthday Blue" 
Day 16 - Mini Nail Topper "Miracle on 34th"  (gold glitter)
Day 17 - Mini Nail Varnish "Shady Lady"
Day 18 - Mini Nail Varnish "Purple Rain-Bow"
Day 19 - Mini Nail Varnish "Dangerous Affair"
Day 20 - Mini Nail Treatment; Nail Strengthener "Nail Gym"
Day  21 - Mini Nail Varnish "Prima Ballerina"
Day 22 - Mini Nail Varnish "Hutch"
Day 23 - Mini Nail Varnish "Cookies & Cream"
Day 24 - Full Size Nail Varnish "Rom Com Rouge"

These are such lovely quality- the metallic ones can be a bit sheer so you may need 3 or 4 coats but otherwise you're good! There's SUCH a variety  of colours here too. I think  this  Advent Calendar would be all you need and you'd have the perfect starter kit. I love that  you get nail treatments and glitters as well as a nail file- much more exciting than just nail varnishes (although I'd still be pleased!) They've thought of everything! 
I was so pleased to receive this and it is  definitely   one of  my favourite presents.

Do you use Ciaté? What are your thoughts on them?
Leave me a comment if you'd like!
They've started producing make up now too so I need to get my hands on some soon.

Thanks for reading, next week will either be an E.L.F Haul or a Gerard Cosmetics Haul.
I haven't decided yet! So make sure you pop back for that.

Speak to you soon, 
Abi xxx

P.s. don't forget to follow me on twitter and instagram

​
0 Comments

Nail Art Nut's 2nd Birthday!

13/5/2015

0 Comments

 
Hello everyone!
Today marks the second anniversary of my nail art Instagram!

I created a second Instagram because I had become so obsessed with nail art, I was posting them to my regular Instagram about twice a week! So it made sense to have a dedicated nail art Instagram. 
This is what my nail art Instagram looked like the day I created it and how it looks today!

Picture
Picture
I've also put together a collage of all the nail art designs I have created over the past two years, that's 144 photos! 
Picture
You can view them all individually over on my nail art Instagram which is linked at the top of my blog and the top of this post. 


Nail Art Nut led to a huge hobby of mine and led to the creation of this blog!
I like to think I've improved a lot over the past two years, the top left box holds the first nail art designs I posted and the bottom right holds the most recent designs I've created. 
I think the most important thing I've learnt is not to filter the photos, haha!

Thank you to everyone who follows me and to everyone who supports me. It means the world ❤️
Here's to another year of Nail Art Nut!

Speak to you again on Friday!

Abi xxx


P.s. sorry about all the exclamation marks, I'm excited. 
0 Comments

Butterfly Wing Nail Art Tutorial

10/5/2015

0 Comments

 
Hello everyone!
Happy Sunday to you.
I have another nail art themed blog post today; this butterfly wing nail art tutorial. 
On Wednesday, it'll be my nail art instagram's second birthday! 
Butterfly Wing Nail Art Tutorial

You Will Need

Butterfly Wing Nail Art Tutorial
- A Base Colour, I chose orange, but an ombré would look incredible, I just didn't have time.  (Barry M 'Block Orange')
- Black Nail Varnish (Barry M 'Black')
- White Nail Varnish (Sinful Colours 'Snow Me White')
- A Surface To Drop Paint On
- A Dotting Tool (Large End & Small End)
- A Long, Thin Paintbrush

Method

Butterfly Wing Nail Art Tutorial
Start by painting a curved line from the top of the nail, down to about one third of the nail on the opposite side. 
Butterfly Wing Nail Art Tutorial
Next, paint three straight lines starting at even intervals across the first line you painted. 
Butterfly Wing Nail Art Tutorial
Leaving space at the bottom of the nail, connect the three straight lines with curved lines. 
Butterfly Wing Nail Art Tutorial
Using the large end of the dotting tool, fill in the bottom of the nail. 
Butterfly Wing Nail Art Tutorial
(I sprayed it with quick dry spray, so that's why it looks gooey). Using the large end of the dotting tool, dipped in white, create two dots. 
Butterfly Wing Nail Art Tutorial
Fill in the remaining space using the smaller end of the dotting tool.
Butterfly Wing Nail Art Tutorial
When I created this on my acrylic nails, I used a Barry M Nail Art Pen (which made it so much easier, I strongly suggest you get one!) and I just used the smaller end of the dotting tool. 


It is a little bit fiddly, especially doing it on your own nails, but I think they're really pretty and definitely worth the effort. 


I'm hoping to do a tiny blog post on Wednesday to commemorate Nail Art Nut's second birthday, but it's the night I work late so I'll have to see!
Otherwise I'll speak to you on Friday for another 5 Things Friday blog post. 


Thanks for reading!


Abi xxx
0 Comments

Top 5 Nail Art Starter Items | 5 Things Friday

8/5/2015

0 Comments

 
Hello Everyone!
A happy Friday to you! 
I did a post similar to this when I first started blogging a year and a half ago, but I have since improved and I think this is much more concise. 

Picture

Make Up Sponges

Make up sponges
Perfect for sponging on colour to create ombrés or gradients. I bought a big pack for £1 from Primark.

Nail Glue

Elegant Touch Brush On Nail Glue
Nail glue has many uses; it can be used for sticking on fake nails, applying gems or studs and sometimes I use it if my nail tears and I don't want it to rip off! Just put a blob over the tear. 
I love this brush on nail glue, I buy it from Superdrug for £3.08. 

Striping Tape

Striping Tape
I bought mine from Amazon years ago, and you tend to get lots of rolls in a pack in different colours. It's super cheap and it'll last you forever, I'm nowhere near finishing a roll yet. You can use it to create stripes by placing it on dry painted nails or you can use it to create clean, straight lines, by placing it on your nail, painting over it and pulling it off with tweezers. 

Dotting Tools

Dotting Tools
Definitely worth having. You can easily buy them on Amazon. Sure, using tooth picks and Bobby pins is fine, but you get much better results using the proper tools, plus they're not expensive and you feel more sophisticated using them (well, I do anyway). 

Nail Art Brushes

Nail Art Brushes
Did you know that these are also super cheap and available on Amazon? Because they are (Haha).
These are perfecto for painting really thin, long lines and little details. 


Did you find this helpful? 


What beauty or nail art tool do you find essential? 
Leave me a comment letting me know!


Thanks for reading! I'll speak to you on Sunday,
Thank you to those who have cast their vote in the survey, it's just in my sidebar if you were interested!


Abi xxx
0 Comments

5 Favourite Nail Art Designs | 5 Things Friday

24/4/2015

0 Comments

 
Hello everyone! 
Thank goodness it's Friday!
I've been lacking in nail art designs and inspiration for a while now, but I've recently become inspired again *yippee* so expect some new nail art designs soon. 
On the topic of nail art (in case you hadn't noticed the theme of today...), I scrolled through my Nail Art Instagram and chose five of my favourite nail art looks to date and I'd like to share them with you today. They're all super fun, colourful and most importantly, easy. 

Butterfly Wings

Picture
Instagram 

Pink Ombré

Picture
Instagram

Colour Block

Picture
Instagram | Tutorial 

Yin & Yang

Picture
Instagram

Alexa Chung Inspired

Picture
Alexa's Pic | Instagram | Tutorial

Just a quick post today, hope it sparked some inspiration.
If you'd like tutorials for any of these, let me know, I'd be happy to recreate them! 


I'm not posting on Sunday because it's my mum's birthday and I'm looking forward to spending the day with her :) 


Leave me a comment telling me which design you like the most and I'll speak to you again in a week! 

For more nail art designs, make sure to follow my nail art Instagram which is linked here and at the top! Thank you 

Thanks for reading, and don't forget about the survey!
Have a lovely weekend,


Abi xxx
0 Comments

Acrylic Nail Application

8/3/2015

0 Comments

 
Hello Everyone!
Happy Sunday! Did you know it's also International Women's Day?
Today I thought I'd do a little post showing you how I apply my acrylic nails.
Brace yourselves for some last minute, shocking quality photos...

You'll need:
Picture
- Acrylic Nails (I bought mine from Amazon)
- Nail Glue (Elagant Touch Brush On Nail Glue from Superdrug, £3.09)
- Nail Clippers/Scissors 
- A Range of Nail Files (some more coarse than others)
- Nail Varnish of Your Choice
Picture
Picture
In the set of nails I bought, you get 10 individual packets of different sized nails. For my thumbs, I use packet 0, index finger is packet 4, middle finger is packet 3, ring finger is packet 5 and my pinky is packet 8. As the numbers increase, the nail size decreases. 
This is just a reference as your fingers will probably require different nail sizes to mine!

I find it helpful to lay the nails out in order so I can just grab them easily, but if you're not a mental person, feel free to not bother. 
Picture
I find it easier to paint a lot of glue (And I mean a lot) over my nail, rather than the acrylic nail, and then press and hold in place for ten seconds while the glue adheres. If you prefer to paint the acrylic nail rather than your own, you do that. It's all about preference. 
Picture
Once the nail has had time to stick, use the nail clippers or scissors (Bear in mind that acrylic nails are thicker and stronger than just fake nails. I suggest clippers as my nail scissors broke half way through. It wasn't even the blade, it was the handle! You may have seen it on my Instagram) to roughly cut the shape and length you want your nails. You could cut straight across for square nails, I've been really into the rounded almond shape recently. 
Picture
Using a coarse nail file, file the nail into shape. Use a finer nail file to really smooth out the nail edge and make it look perfect. 
Picture
Do all your nails in the same way and then they'll look a bit like this. Personally I think I did them too short this time around, but that's ok, I've only done them a couple of times. Practice makes perfect!
Picture
Add a lick of paint and you're set! This is two coats of Make Up Academy's 'Amaretto Crush' on top of one coat of Barry M Gelly Hi-Shine in 'Almond'. 
I love the lighter colours, especially Gelly colours, on acrylic nails. The first time I did them, I painted them with 'Almond' and was obsessed. 

Hope that gives you a helpful little insight.

All my social networks are at the top, thanks for reading and I'll speak to you soon!
Abi xxx
0 Comments

L.O.V.E | Valentine's Day Nail Art Tutorial 

13/2/2015

0 Comments

 
Hello everyone!
Yay it's friday! It's also Friday the 13th, are any of you superstitious? 
Today I bring you the last of my Valentine's Day nail art tutorials (that was weirdly formal).
Picture
You Will Need:
Picture
- White Nail Varnish (Sinful Colours 'Snow Me White' [DISCONTINUED IN THE UK]) 
- Black Acrylic Paint (Amazon for about £2ish. It's thinner than nail varnish so it won't string)
- Red Nail Varnish (Miss Sporty Lasting Colour)
- Teeny Tiny Brush (also from Amazon)

Picture
Start by using the teeny paintbrush dipped into the black acrylic and mark out the top, middle and bottom of the 'L'.
Picture
Connect the lines together to pad out the 'L' shape, leaving a little overhang on the end of the base. 
Picture
Fill the bottom half of the 'L' in with the black...
Picture
... And fill in the top with the red. 
Continue the rest of the letters in the same way.
 In the inspiration picture, the 'o' is in a heart shape which is a nice accent, but you could just do a normal 'o' if you wanted. 

This is the end result:
Picture
It was my first time using acrylic paint so they look a bit sketchy. It is thinner than nail varnish though so it's easier to control, but it might need more coats as it can be quite sheer. 

I'm still really pleased with how they turned out!
If you give them a go, make sure to tag me using #abibailey or #nailartnut, I'd love to see them. 

I'm hoping to do a blog post on Sunday but I'm not sure yet,
Have a good weekend and I'll speak to you soon, 


Abi xxx
0 Comments

"Mwah!" | Valentine's Day Nail Art Tutorial

12/2/2015

0 Comments

 
Hello everyone!
Day two of my Valentine's Day nail art tutorials!
Today is this gold and pink "mwah!" design. 
Picture
You Will Need:
Picture
- Light Pink Nail Varnish (Barry M 'Strawberry Icecream') 
- Pink Nail Varnish (Barry M Gelly Hi-Shine 'Pomegranate')
- Gold Nail Varnish (Barry Foil Efects 'Gold')
- Teeny, Tiny Paintbrush (From Amazon) 

Picture
Paint your nails light pink and let them dry. 
Dip the brush into the pink and paint the bottom lip by creating a sort of squashed love heart. 
Picture
Then paint the top lip which is a bit like two connecting triangles. 
Picture
Finish with a few horizontal gold stripes, and you're all set! 

As usual; super easy and very cute!
If you give these a go, make sure to tag me using #abibailey or #nailartnut 


Thanks for reading and I'll see you tomorrow with another tutorial! 


Abi xxx

0 Comments

Valentine Roses | Valentine's Day Nail Art Tutorial 

11/2/2015

0 Comments

 
Hello Everyone! 
Today is the first of my Valentines Day nail art tutorials! 
Today it is these 'Valentine Roses'
Picture
You will need: 
Picture
- Light Pink Nail Varnish (Barry M 'Strawberry Icecream')
- Pink Nail Varnish (Barry M Gelly Hi-Shine 'Pomegranate')
- Green Nail Varnish (Barry M 'Spring Green')
- Black Acrylic Paint (from Amazon for £2ish, or any craft shop) or Black Nail Varnish 
[Acrylic paint is thinner so it won't string like some black nail varnishes]
- Teeny, Tiny Paintbrush (also from Amazon, also very cheap)

Picture
Paint your nails light pink and let them dry. 
Using the brush of the pink nail varnish, make random blobs on the nail, they shouldn't be neat. 
Picture
Using the teeny, tiny brush dipped in the green nail varnish, make little leave shapes around the blobs (roses). 
Picture
Picture
Picture
Again, using the teeny, tiny brush, make random swirls with the black paint, to look like the petals. 
Then you're done! It's looks like lots of steps but they're quite simple. 

I love doing roses, they're one of my favourite nail art designs to do because they look so pretty and they're so easy to do. 

If you recreate these, make sure to tag me using #abibailey or #nailartnut, I'd love to see them. 

See you tomorrow with another nail art tutorial! 

Abi xxx
0 Comments

Christmas Nail Art Goodies

18/1/2015

0 Comments

 
Hello everyone!
As I mentioned last week in my Christmas Make Up blog post, today I'll be showing you all the nail art stuff I was lucky enough to receive for Christmas. 
Picture
- Shoe/Leg Nail Files
- Intensive Hand/Nail Mask
- Sally Hansen Double Duty Base and Top Coat
- 4 Sided Nail File/Buff/Shine 
- Butterfly Printed Fake Nails
- Three Barry M Nail Varnishes
- One Primark Nail Varnish 
Picture
Starting with the basics... 
The soap at work can be quite harsh on my hands and they get really sore and dry, they're not like that at the moment but if they get bad again this nourishing hand mask will be lovely and soothing! 
The Sally Hansen Double Duty is an excellent base and top coat, so it's always handy to have on hand (too many puns?). 
Picture
Nail files are always useful! These ones are funky looking too. Its also great to have a nail buffer, nail file and nail shiner(?) in one. 
Picture
As much as I love creating nail art designs, sometimes it's so much quicker and easier to just stick some preprinted designs on and then, when you're bored, just peel (although you should soak) them off!
Plus I think they are literally a £1 and there's lots of different designs. Fab. 
Picture
Here we have Barry M Gelly Hi-Shine in 'Plum', Barry M Limited Edition 'Jingle Bells' , Barry M Glitterati in 'Starlet' and a silvery blue nail varnish from P.S Love which is a Primark brand.
I haven't got round to using 'Jingle Bells' yet (it has gold confetti, with gold stars and red flecks) or the silvery blue, but I've used Plum and Starlet together and that looks lovely. The thing I love about the Glitterati paints is that they're like a lacquer so they're really sparkly, to the point where you could where them on their own, with two coats. 

So that's all my Christmas Nail Art stuff! 
I haven't decided what I'm posting next weekend so you'll just have to keep your eyes peeled (or follow my Twitter and Bloglovin ;) links are at the top!) 


Thanks for reading and I'll speak to you next week,
Abi xxx
0 Comments

Stag's Head | Christmas Nail Art Tutorial

17/12/2014

0 Comments

 
Hello everyone! 
This week's tutorial is of this stag's head. Not particularly Christmassy, but festive all the same. 
Picture
You wil need:
- A base colour, I chose white but apparently didn't feel like photographing it! (Sinful Colours 'Snow Me White')
- Red Nail Varnish (Miss Sporty Lasting Colour) 
- A Thin Paintbrush 

Picture
Picture
Start by making a rectangle on the bottom half of the nail, then add a semi circle below it to create the stag's head. Fill them in. Leave lots of room at the top of the nail for the antlers. 

Picture
Next, round off the top of his head and give him little ears. 

Picture
Lastly, create the antlers. Create two curved lines, starting from the top and leaving space in the middle. 
For the little antlers, just create two lines curving towards the middle but not touching. 

And that's it! I know I say this A LOT but wasn't it easy? It's always easier to break things down into steps... That, and I don't do things that are difficult!

If you recreate this make sure to use #abibailey or #nailartnut so I can see them!

I'll be back on Sunday with a gingerbread man recipe. Yum yum!

Thanks for reading and speak to you Sunday,
Abi xxx
0 Comments

Santa's Hat | Christmas Nail Art Tutorial

10/12/2014

0 Comments

 
Picture
Hello everyone!
This week's tutorial is Santa's hat. 
As usual, it's pretty simple and I've broken it down into steps for you. 
You will need: 
Picture
- Flesh Toned Nail Varnish (Revlon Nail Art Expressionist in '330/Silhouette')
- White Nail Varnish (Sinful Colours 'Snow Me White) [DISCONTINUED IN THE UK]
- Red Nail Varnish (Miss Sporty Lasting Colour)
- Thin Paintbrush 

Let's get started!
Picture
Start by painting your nails a flesh tone colour and then paint a white stripe across the middle of the nail. 
Picture
In the space above the white stripe, fill it in with the red. 
Then using the thin paintbrush, create a curvy, upside-down triangle and make sure that the point reaches the middle of the bottom section of the nail. 
Picture
Lastly, neaten up the shape and add a white blob at the bottom of the point, to create the fluffy bobble on Santa's hat. 

That's it! If you recreate any of my nail art designs, make sure to use #nailartnut or #abibailey so I can see them! 

Thanks for reading and speak to you on Sunday, where I'll show you how I've decorated my room for Christmas. T'is the season!

Abi xxx
0 Comments

Santa's Belt Buckle | Christmas Nail Art Tutorial

3/12/2014

0 Comments

 
Hello everyone!
Here is the first Christmas nail art tutorial: Santa's Belt Buckle!
You only need three colours and one tiny brush, so it's super easy.
Let's get started. 
Picture
You will need: 
- Red Nail Varnish (Miss Sporty Lasting Colour)
- Black Nail Varnish (Striper from Primark)
- Silver Nail Varnish (Barry M Foil Effects) 
- Thin Paintbrush 

Picture
Picture
Starting with a red base, paint a black strip across the third (lower) quater of the nail. 

Once that has dried, paint a small silver line, starting from the middle of the black strip, stretching across to the right side. 

Lastly, create a silver box, going through the silver line and extending past the black strip, above and below. 


How mega easy was that?! Only two simple steps. 


I think this makes a nice accent nail and would look fab paired with the next nail art design I have lined up... Keep your eyes peeled over here and on my nail art instagram! 


I'll be back with another blog post on Sunday. 
As always thanks for reading and speak to you soon!
Abi xxx
Picture
0 Comments

Gold Glitter Chevrons | Nail Art Details 

20/11/2014

0 Comments

 
Picture
Hiya!
These are the details for the 'Gold Glitter Chevrons' nail art that you might have seen on my nail art Instagram (@nailartnut). 
It's approaching Christmas time so I'm starting to get festive and play around with glitter a bit more plus I was dying to use my new chevron stencils!

Here's what I used:
- Sally Hansen Maximum Strength 
- Miss Sporty Lasting Colour in either 3294 or 160 (I'm not sure which number is the colour) 
- Chevron stencils from She Sells Seashells (see last blog post here)
- Barry M Aquarium Collection in 'Treasure Chest' 


Speak to you on Sunday!
Abi xxx
0 Comments

Spider Nail Art Tutorial

26/10/2014

0 Comments

 
Here's what you'll need:
Hello everyone!
I have another nail art tutorial for you today (sorry if you're getting bored of them, my blog will be back to normal soon!) 
Today is this incy wincy Spider, you need very little to create him! Let's get started. 
Picture
Picture
- White Nail Varnish (Sinful Colours 'Snow Me White')
- Black Striper/Nail Varnish (From Primark)
- Dotting Tool (or Bobby pin)

Picture
Using the black striper, draw a line from the top of the nail, down to the middle. 
Next, using the dotting tool and the black, make a large dot at the end of the line. 
Picture
Make a smaller dot directly below the dot you just made, overlapping it slightly. 
Picture
Using the striper, create the four smaller, inside legs. 
Picture
Lastly, create the last four legs, starting from the middle of the spider's body. 

There we go, looks a bit tricky but isn't too bad. 
Picture
I created this spider web by drawing four diagonal lines from one corner and linking them with little 'U' shapes. 
Picture
Also how cute are these cupcakes that my sister made and decorated?! So simple, yet so effective (and very tasty) 


That's it from me today! As usual if you recreate these make sure to tag them with #NailArtNut and/or #AbiBailey, I'd love to see them! 


I'll probably speak to you in the middle of the week with another tutorial, I'm not sure yet, otherwise it'll be Sunday like usual!


Thanks for reading!
Abi xxx
0 Comments

Jack O' Lantern Nail Art Tutorial

22/10/2014

0 Comments

 
Hello everyone! 
Ooh a mid week blog post, how sneaky...
I'm going to post the tutorial today as Halloween is creeping (get it?) up on us and I have a lot of designs I want to share with you before the occasion is over. 
This design is so quick and simple but looks really effective! Let's get going. 

Picture
Here's what you'll need:
Picture
- Orange Nail Varnish (Barry M 'Block Orange')
- Brown Nail Varnish (Barry M 'Paprika')
- Black Nail Varnish (with a tiny brush) or Striper
- Long thin paintbrush
Totally optional:

- Glow In The Dark Nail Varnish (from Topshop last year)
Picture
Start with an orange base (and a couple of coats of glow in the dark nail varnish if you're feeling fancy) and use your long thin paintbrush to create two lines vertically down the nail to add texture. 
Picture
Create three triangles for the eyes and nose holes. 
Picture
Lastly create an upside down crown shape for the mouth (or come up with your own, much better shape)
Picture
Voila! Said it was easy, didn't I?
Looks pretty good in the dark too!

Don't forget to tag me if you recreate this! I'd love to see them. :) 
#nailartnut #abibailey

Thanks for reading and hopefully speak to you on Sunday!
Abi xxx
0 Comments

Birthday Nail Varnishes

12/10/2014

0 Comments

 
Hello Everyone!
As nail varnish and nail art is a passionate hobby of mine, I tend to receive at least a couple of nail varnishes or nail themed items for birthdays and Christmases. This year I was lucky enough to get 5 nail varnishes from various family members. It just so happens that all the colours are perfect for autumn/winter too. 
Picture
From left to right I have two Barry M Gelly Paints in 'Cocoa' and 'Paprika' (from their autumn collection), two from Seventeen's Colour Carnival range in 'Dark Pink Shimmer 034' and 'Plum Shimmer 041', and lastly is an Avon Gel Finish Nail Enamel in 'Royal Vendetta'. I love when nail varnishes have good names!
Picture
Cocoa is a dark brown and will be perfect for winter, it is quite opaque but I always like to do at least two coats anyway.
Paprika is a lovely burnt orange/cinnamon/brown colour, it too is very opaque and you would probably be fine with one coat, but like I said, I think two just gives a better finish. 
The only problem I have with Barry M is that they can chip/peel quite easily, but as they're such a good price and have a huge range of colours with excellent colour pay off, I don't mind too much.


Dark Pink Shimmer and Plum Shimmer are VERY sheer. Depending on your preference, you'll probably need at least three coats. The pink was a bit better but the plum needed at least four coats to get a solid opacity. I always find that shimmers are a bit translucent anyway. I think they'd look lovely as a topcoat on top of bright colours too, just to give a pop of shimmer. 
They're really lovely quality and colours though, and they dry quickly as they're quite thin, so having to do more coats isn't as time consuming as it sounds.


I cannot get enough of Royal Vendetta! Not only is the name amazing and the colour an eye catching royal blue, but as it is a gel finish, it's super shiny and long lasting, so it is very chip resistant (I wore it to work for like three days and it only chipped slightly). It does look a bit streaky though so you may need two to three coats for best results.

Just a short post today to show you my new nail varnishes to add to my collection! I'm such a fan of darker colours for autumn/winter! What's your favourite colour to wear?
I've made a start on my halloween nail art designs too, so they'll be popping up on here and on my nail instgram (@nailartnut) in the next couple of weeks, so look out for those!


As always, thanks for reading and I shall speak to you soon!
Abi xxx
0 Comments

Pink With White Daisies | Nail Art Details

10/9/2014

0 Comments

 
Picture
Hello everyone!
These are the details for these cute daisies.

- Essie 'Madison Ave-Hue'
- Primark White Striper
- NYC 'Electric Yellow'
- Sally Hansen 'Double Duty Base & Top Coat'
 
I was going to do these around spring time, but they're so pretty I couldn't wait!

Thanks for reading, 
Abi xxx
0 Comments

Grey and White, Dots and Stripes | Nail Art Details

4/9/2014

0 Comments

 
Picture
Hello Everyone!
Here are the details for this grey and white, nail art look.


- Barry M 'Grey'
- White Striper/Dotting Tool from Primark

I also used a dotting tool dipped into some white nail varnish because the dotting tool is a bit unpredictable on the the striper/dotting tool duo!

This is incredibly easy to do so it seems a bit silly to do a blog post about it but I'mma do it anyway!

(I need to cool it with the exclamation marks)

Speak soon! 
Abi xxx
0 Comments

Current Favourite Nail Varnishes

31/8/2014

0 Comments

 
Hello everyone! 
Today I thought I'd share with you my favourite nail varnishes at the moment, even better they're all very affordable. 
Picture
Picture
This is two coats of the varnish.
Collection 'Work The Colour' in 'In The Pink' (£1.50)
Collection 'Work The Colour'  in 'Blurple' (£1.50)
Barry M Matte Nail Paint in 'Copa Cabana' (£3.99)
Barry M Nail Paint in 'Strawberry Ice Cream' (£2.99)
Barry M Nail Paint in 'Grey' (£2.99)

In The Pink is a typical lipstick pink colour, its lovely, very feminine. Pink is my favourite colour to wear on my nails.
How great is the name Blurple? I'm obsessed with the name and the colour! As the name describes; it is a blueish, purple colour. Perfect for the colder months (I'm so excited for autumn/winter)
Copa Cabana is a matte coral/orange colour, it was perfect in summer and will continue to be throughout autumn.
Strawberry Ice Cream is a classic baby pink colour. It's very sheer so depending on what look you're going for and how opaque you want it you might need more or less coats than I have done. 
It's very elegant.
Grey is such an edgy colour and I wasn't expecting to love it as much as I do! I think it'll be perfect for autumn. It can really change the look of an outfit too; adds a bit of edge to a girlier outfit or adds a hint of glamour to a casual outfit. 

There's a little insight into the nail colours I have been loving recently.
What colours have you been loving? Let me know!

Can you believe it's the last day of August?! Where has this year gone? On the plus side tomorrow is my blog's first birthday, so check back tomorrow for a post about that :)


Speak to you tomorrow,
Abi xxx
0 Comments

Tiny Polka Dots and Little Gems | Nail Art Details

8/8/2014

0 Comments

 
Picture
Hello everyone! 
As promised here are the details for my latest nail art design.  

- Essie 'Madison Ave-Hue'
- White Striper/Dotting Tool from Primark
- Little Tear Shaped Gems from a gem wheel I bought in Primark a while ago 
- Sally Hansen 'Double Duty Base & Top Coat' (for shine and to adhere the gems)
- A wooden skewer dipped in a tiny bit of top coat to help place the gems

Talk to you on Sunday! 
Abi xxx
0 Comments

Paint Drips, Diamond and Yin/Yang Nail Art Details

1/8/2014

0 Comments

 
Picture
Hello everyone!
I know it's not my usual blog post day, but I feel like once a week isn't enough, and I'd like to blog more so I thought that each time I do a new nail art design, instead of just posting it on my nail art Instagram, I'd post it here too, along with the details of what I used etc! That sentence needed full stops!

For this nail art, I used:
- Barry M 'Strawberry Icecream'
- Barry M 'Blue Moon'
- Sinful Colours 'Snow Me White'
- Black and white stripers from Primark
- Dotting tool with a large end and a smaller end
- Sally Hansen 'Double Duty Base & Top Coat'
- Matte Top Coat from Primark


If you'd like any other details or have any questions, feel free to leave a comment!


I shall speak to you on Sunday,
Abi xxx
0 Comments

'Brogue' Style Nail Art | Tutorial

27/7/2014

0 Comments

 
Hello Everyone!
Hope you've all had a fun weekend.
Today I thought I'd do a nail art tutorial as my blog has been very make up and shopping based recently (which I love but thought it needed a change). 
I saw this design on Instagram but as it was just featured and not by the actual account holder, I can't credit it. I'm not sure what you'd call it but it reminds me of the black and white brogues! 
Picture
Here's what you'll need:
Picture
- Bright Pink/Coral Nail Varnish (Sinful Colours in 'Folly')
- White Nail Varnish (Sinful Colours in 'Snow Me White')
*Bare in mind Sinful Colours has been discontinued in the UK*
- A White Striper and a Black Striper (Mine came in a set of three from Primark and have dotting tools built into the cap)
(- Black paint and a small dotting tool/tooth pick if you don't have the stripers from Primark)
- Masking Tape and Scissors (Not a necessity, it just makes the first step quicker/neater)


Picture
Starting with a pink nail, using two small bits of masking tape, cover the bottom of the nail to create a triangle at the top.


Alternatively, you could just use a white striper to create two lines and then fill it it.
Picture
Paint over the triangle shaped gap with the white (you might need to be quite generous to get an opaque colour) and then quickly but gently remove the tape to get clean lines.


You could also use the white striper to do this or just to neaten up the edges.
Picture
Using the black striper create a V along the edge and then a small triangle at the top. 


The best way to do this is to hold the striper at the middle and gently pull back and then do the same for the other line. 
Picture
Using the dotting tool end of the striper (or a dotting tool/tooth pick dipped in black paint) create a row of little dots between the V and the triangle.
Picture
Using the black striper, map out the step shapes (if you don't know what I'm on about, scroll back to the top to look at the design).


This could take a couple of attempts to get it right (can you tell?).
Picture
Fill the step shapes in with the black striper or a big dotting tool dipped in black paint.
Picture
Once everything has dried, use a top coat to smooth out the design and make it long lasting.


And you're done!


There's quite a lot of steps to this one, but once you break it down it's not too tricky! 
That's it for this week! If you do give them a go use #AbiBailey or #NailArtNut, I'd love to see them! 

As always, thanks for reading and I'll speak to you soon!

Abi xxx
0 Comments

Beauty Haul/Review

13/7/2014

0 Comments

 
Hello everyone! 
Hope you've had a fun weekend.
I've done a fair bit of shopping recently so I thought I'd show you the beauty bits I've bought over a couple of shopping trips. A massive bonus is that everything was very affordable and reasonably priced!
Picture
Picture
This is the No Clumps Definition Mascara by Collection and its excellent, really lengthens my lashes and is very buildable, and its also only £3. The I <3 Punk Jumbo Eyeliner Pen is from a new make up range in Wilkos called 'Essence' and I was a bit weary because I am so attached to my Maybelline Gel Eyeliner, I didn't think I could use, let alone like, a different eyeliner. I've also never had much luck with eyeliner pens as they're always too watery. It claims to be 'deep black, water resistant, long lasting and smudgeproof', well I used it for the first time today and I can agree that it is deep black, long lasting and smudgeproof but I don't agree with it being water resistant because I tested it on my hand and it washed off very easily, but I'm not looking for it to be waterproof so I'm not bothered! It's easy to use and I think this was only £1.60 or something too! Bargain!
Picture
This is the Oil Control Make-Up Base (ie a primer). I can't really give it a thorough review as I wore it for the first time today and have only been wearing it since about 2pm but from that, I really like it. I struggle with oily skin and this primer claims to 'balance out oily skin, minimise the appearance of pores and improve make up wear'. I think I look less shiny, my pores look smaller and I haven't had to touch up my foundation or powder and for only £3.50 you can't really complain! Especially as I was considering buying the full size version of the Smashbox Photo Ready primer that I had a tester of (and loved) and that's £25! 
Think I'm really going to like this Essence range! 
I have heard nothing but good things about the Revlon Lip Crayons and as I mentioned in my last blog post, you cannot go wrong with Revlon lip products. I bought the Revlon Colourburst Lacquer Balm in 120 'Vivacious' and the Revlon Colourburst Matte Balm in 205 'Elusive'. These were two for £10 in Superdrug and considering they are £8 each I would have been mental not to get two! I have worn the Lacquer Balm and I absolutely love it, the colour is gorgeous, it's really pigmented, it's long lasting and it smells of mint and leaves your lips tingly. I haven't had chance to wear the Matte Balm yet but I have tried it and I love the colour and the matte effect, it's not drying like a lot of matte lip products. The colour is the perfect nude/pink colour I have been looking for. 
Picture
We all know I like nail varnish A LOT so how could I pass up a 2 for 3 on all nail stuff in Superdrug? I bought the two matte colours (Copa Cabana and Rhossili) with the pale pink (Strawberry Ice Cream) and as I was only repurchasing Strawberry Ice Cream, because mine had gone thick and gloopy, I was really pleased to get it for free! On a separate occasion I bought the grey (which is just called Grey, how imaginative) and the blue (called Blue Moon). I went for the matte shades purely because I liked the colours! They are very pigmented, dried quickly and look really nice matte, the only issue is that they chip and peel quite easily, this could be down to the basecoat I used but I'm not sure, just thought I'd mention it! They are £4 each. I bought the grey because I don't have a grey and I wanted it to go with an outfit I had planned and I bought the blue because I really wanted a very pale blue. This one is nice because it has a slight shimmer to it which I like! I am a HUGE fan of Barry M Nail Paints and I especially like that they are only £3. I feel like I've said 'like' too much now.


Anyway there's a little insight into my recent beauty buys!
Have you bought anything you're particularly fond of recently? Let me know! 


Thanks for reading, I didn't realise I had that much to say! 


Speak soon,

Abi xxx
0 Comments

Watermelon Nail Art Tutorial

2/7/2014

0 Comments

 
Hello everyone! 
As promised, here is the mid-week blog post of the watermelon slice nail art tutorial! 
Enjoy!
Picture
Here's what you'll need:
Picture
- Green nail varnish (Barry M in Spring Green)
- Red/Pink nail varnish (Barry M Gelly Hi-Shine in Pomegranate)
- Lilac nail varnish (Miss Sporty Quick Dry Clubbing Colours in 344)
- Light Green nail varnish (Sinful Colours in Mint Apple*)
- White nail varnish (Sinful Colours in Snow Me White*)
- Small Dotting Tool
- Small/Thin Brush
*Sinful Colours is being discontinued in the UK
(I have no idea about the rest of the world)

Picture
I used lilac as my base colour, but as I said last time, you can use whatever colour, I just thought it was summery and contrasted well with the green and pink.
Using the brush dipped in white, map out a triangle shape for the watermelon slice, and fill it in using the brush, the nail varnish brush, or a big dotting tool.
Picture
Cleaning off the white from the brush, dip it into the dark green and paint a stripe along one of the edges. This will be the skin of the watermelon.


You might need two coats to get a good opacity, I did.
Picture
Again, remembering to clean off the brush, leave a gap to look like the rind and fill in the rest of the triangle with the pink/red.


(It drives me mental that you can't resize the text boxes!)
Picture
Once the green has dried, use the dotting tool dipped in the light green to add some dots to add more depth and texture to the skin of the watermelon.

You could if you wanted to, add a few tiny black dots to the pink to look like pips but a) I only just realised I had forgot to do that and I took the photos last week, b) It might make the small space look dark, and c) the design is actually quite small in reality so it would go unnoticed anyway.


Done!
Another colourful summery design, this would also look cute as an accent nail.
When you break it down it's easy to manage!
I would love to see your recreations so if you give them a go, tag me in them or use the hashtag #nailartnut or #abibailey, I'll be on the lookout!


I should be back on Sunday with another post for you, until then,
thanks for reading!
Abi xxx
0 Comments
<<Previous
    Abi Bailey
    Follow
    Hello Everyone!
    Thank you for visiting my blog; I post about beauty and lifestyle. Have a read and let me know what you think.
    All my social networks are at the top if you want to keep up with my daily life!
    Abi xxx
    Submit

    Archives

    September 2016
    August 2016
    July 2016
    June 2016
    May 2016
    April 2016
    March 2016
    February 2016
    January 2016
    December 2015
    November 2015
    October 2015
    September 2015
    August 2015
    July 2015
    June 2015
    May 2015
    April 2015
    March 2015
    February 2015
    January 2015
    December 2014
    November 2014
    October 2014
    September 2014
    August 2014
    July 2014
    June 2014
    April 2014
    March 2014
    February 2014
    January 2014
    December 2013
    October 2013
    September 2013

    Categories

    All
    5 Things Friday
    Advice
    Baking
    BEAUTY
    Beauty Favourites
    Birthday
    Blog
    Bloglovin
    Christmas
    Day Out
    DIY
    Easter
    Family
    Fashion
    First Entry
    Glossybox
    Goals
    Hair
    Halloween
    Lifestyle
    Make Up
    Nail Art
    Nail Art Details
    Nailartnut
    New Year
    Ootd/ootn
    Recommendations
    Review
    Shopping/Haul
    Skincare
    Tutorial
    Valentine's Day

Powered by Create your own unique website with customizable templates.