AbiJBailey
  • Blog
  • About Me
  • Twitter
  • Instagram
  • Nail Instagram
  • Pinterest

L.O.V.E | Valentine's Day Nail Art Tutorial 

13/2/2015

0 Comments

 
Hello everyone!
Yay it's friday! It's also Friday the 13th, are any of you superstitious? 
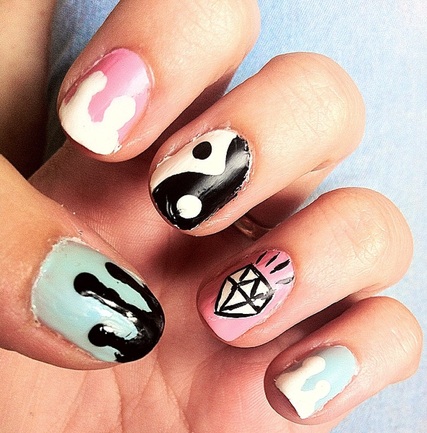
Today I bring you the last of my Valentine's Day nail art tutorials (that was weirdly formal).
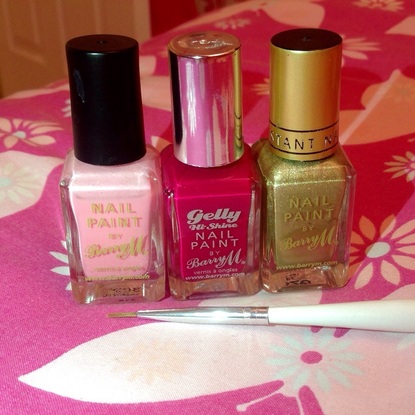
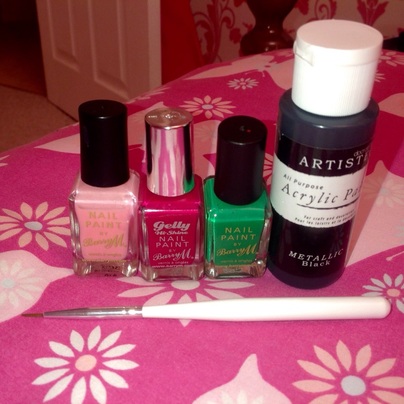
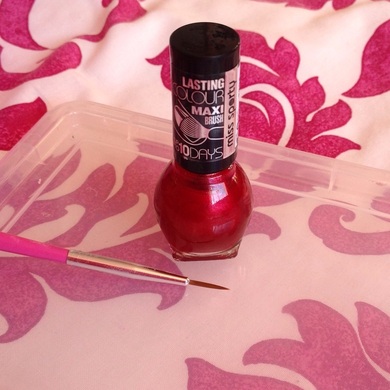
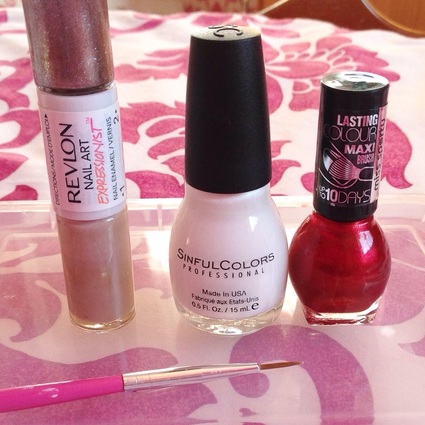
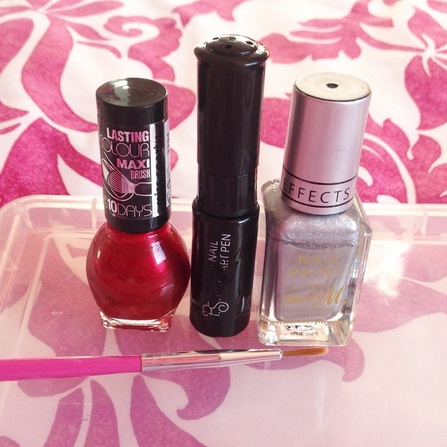
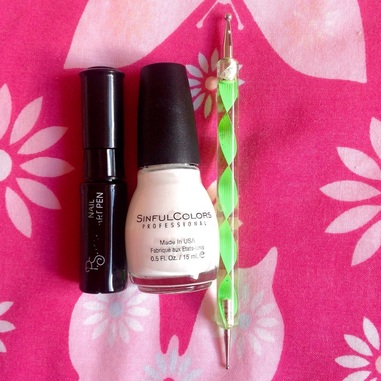
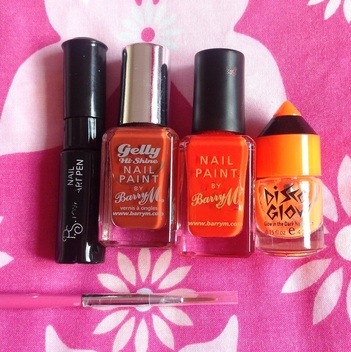
Picture
You Will Need:
Picture
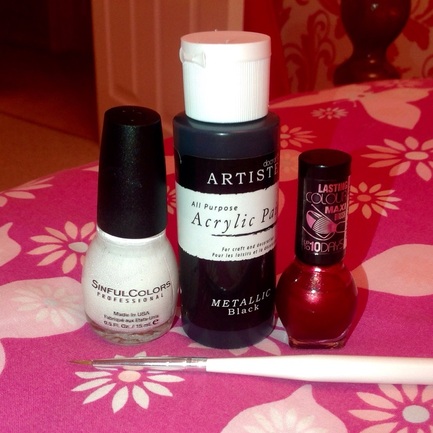
- White Nail Varnish (Sinful Colours 'Snow Me White' [DISCONTINUED IN THE UK]) 
- Black Acrylic Paint (Amazon for about £2ish. It's thinner than nail varnish so it won't string)
- Red Nail Varnish (Miss Sporty Lasting Colour)
- Teeny Tiny Brush (also from Amazon)

Picture
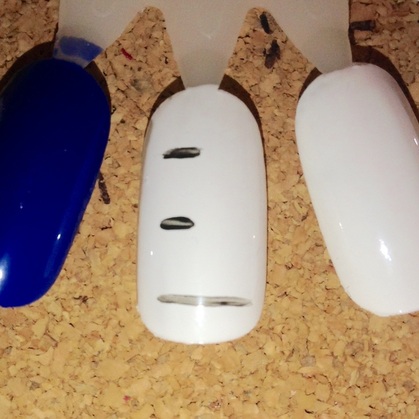
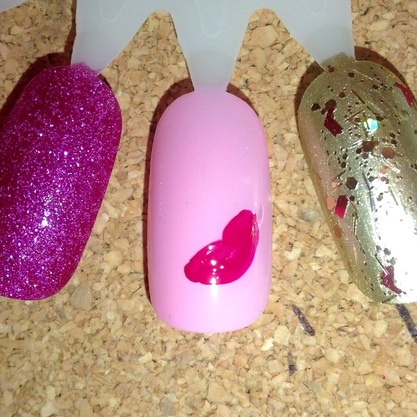
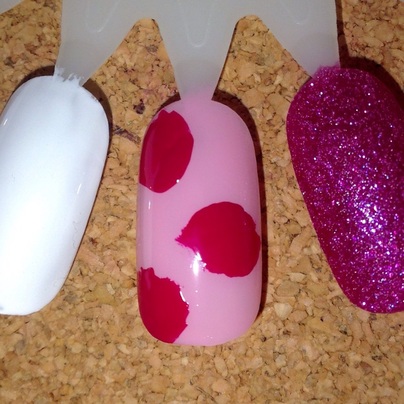
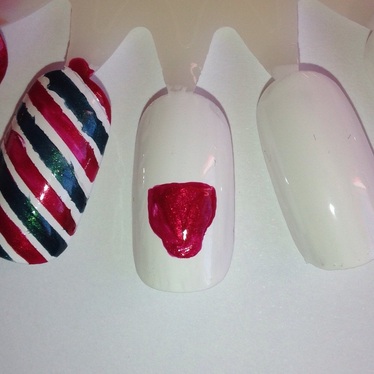
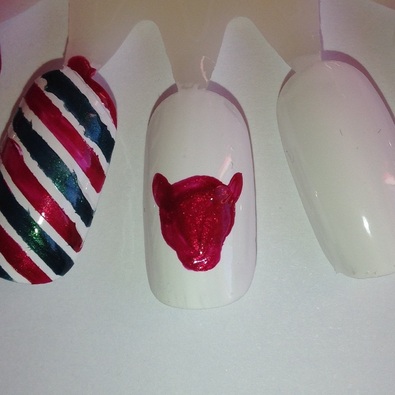
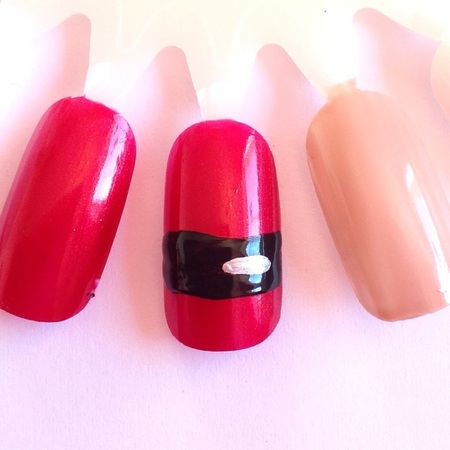
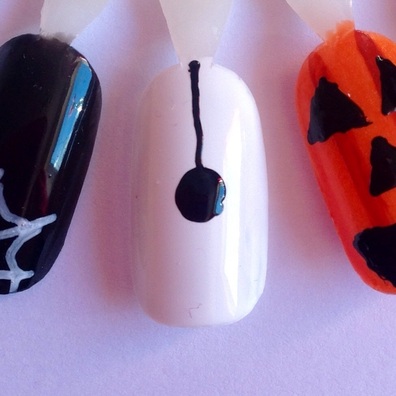
Start by using the teeny paintbrush dipped into the black acrylic and mark out the top, middle and bottom of the 'L'.
Picture
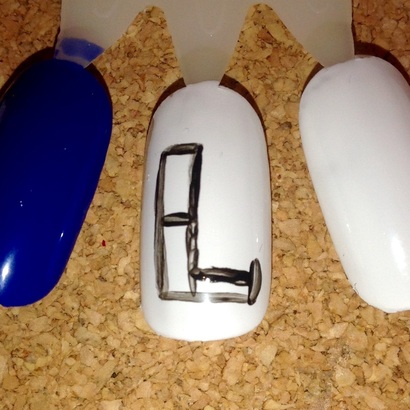
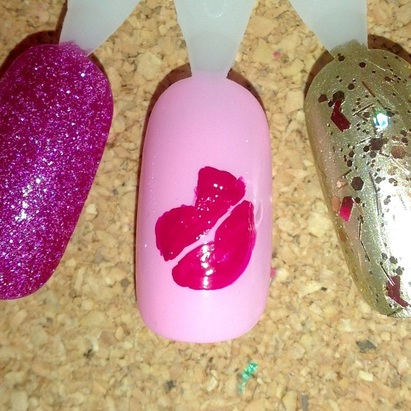
Connect the lines together to pad out the 'L' shape, leaving a little overhang on the end of the base. 
Picture
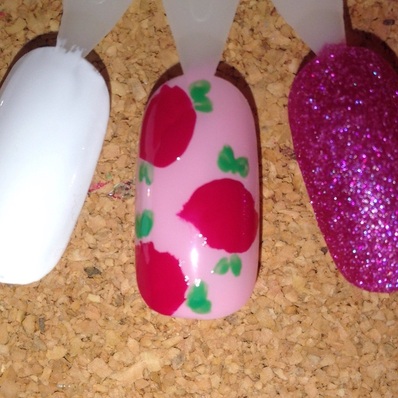
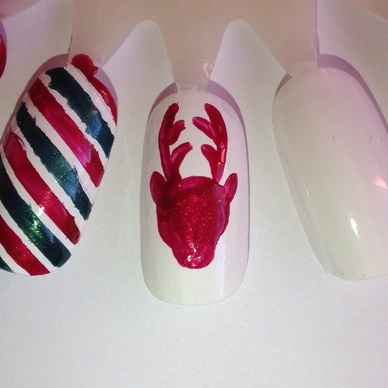
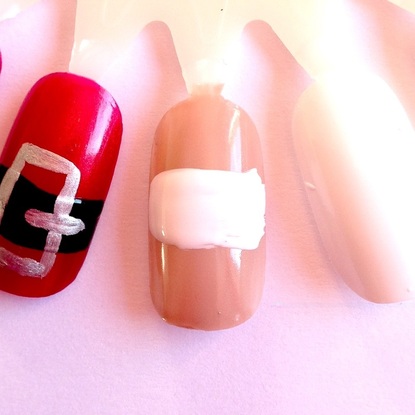
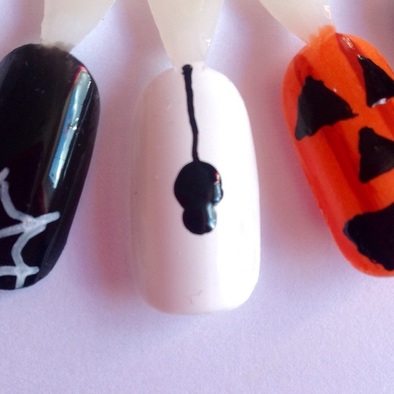
Fill the bottom half of the 'L' in with the black...
Picture
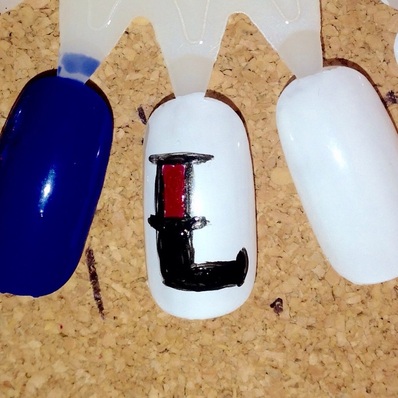
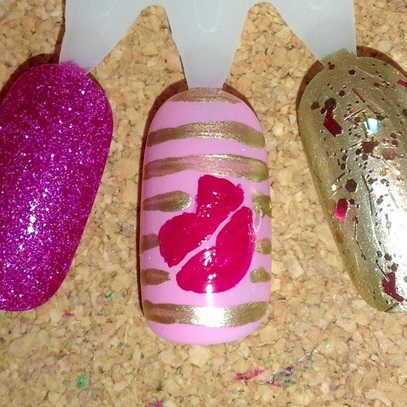
... And fill in the top with the red. 
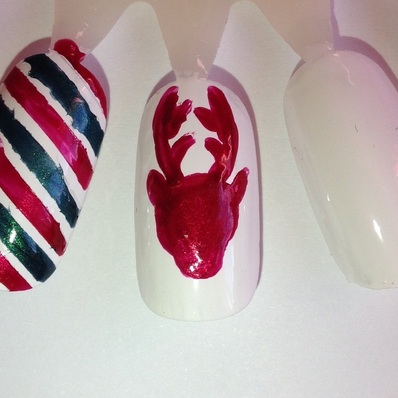
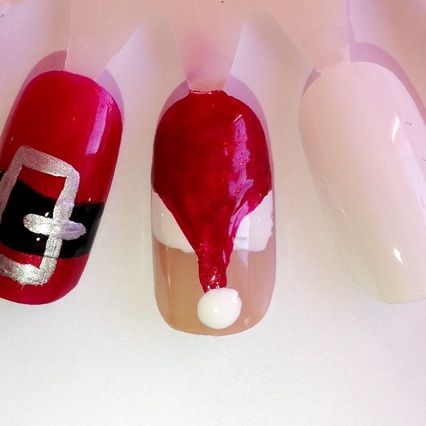
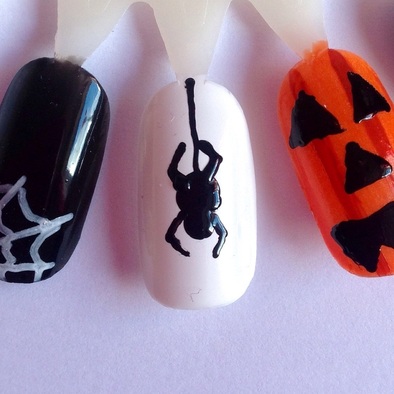
Continue the rest of the letters in the same way.
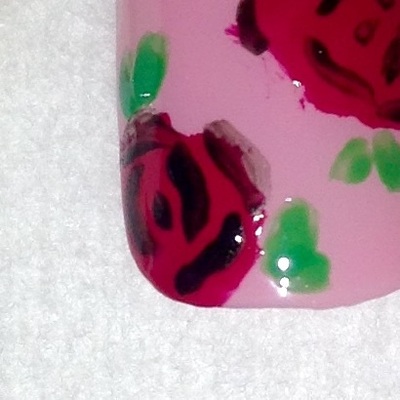
 In the inspiration picture, the 'o' is in a heart shape which is a nice accent, but you could just do a normal 'o' if you wanted. 

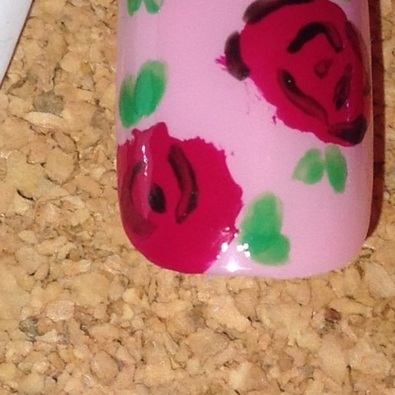
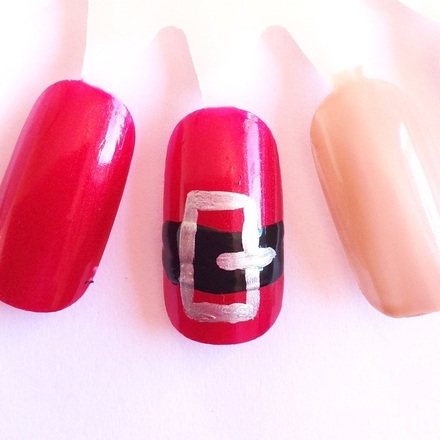
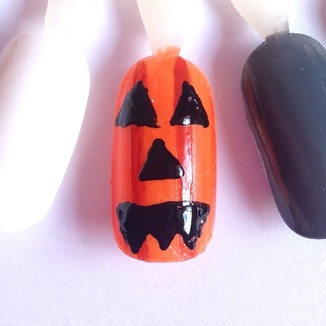
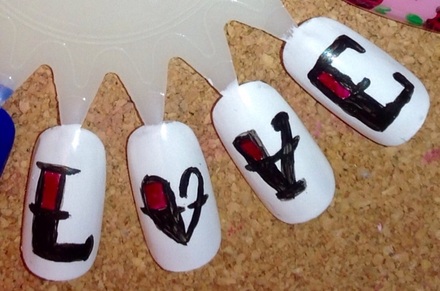
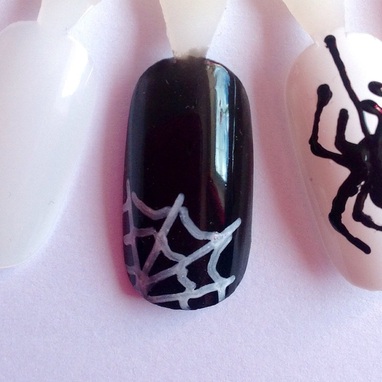
This is the end result:
Picture
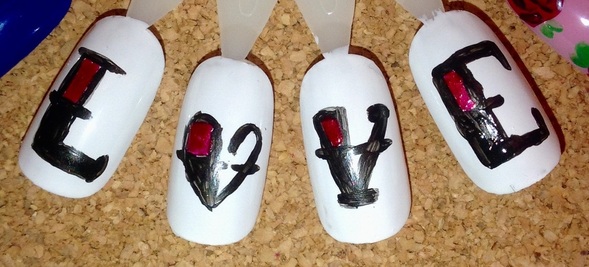
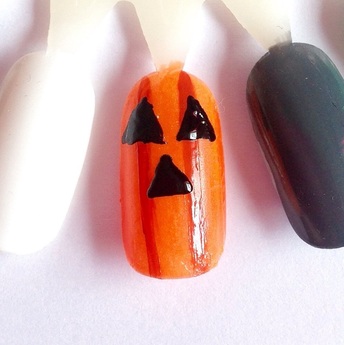
It was my first time using acrylic paint so they look a bit sketchy. It is thinner than nail varnish though so it's easier to control, but it might need more coats as it can be quite sheer. 

I'm still really pleased with how they turned out!
If you give them a go, make sure to tag me using #abibailey or #nailartnut, I'd love to see them. 

I'm hoping to do a blog post on Sunday but I'm not sure yet,
Have a good weekend and I'll speak to you soon, 


Abi xxx
0 Comments

"Mwah!" | Valentine's Day Nail Art Tutorial

12/2/2015

0 Comments

 
Hello everyone!
Day two of my Valentine's Day nail art tutorials!
Today is this gold and pink "mwah!" design. 
Picture
You Will Need:
Picture
- Light Pink Nail Varnish (Barry M 'Strawberry Icecream') 
- Pink Nail Varnish (Barry M Gelly Hi-Shine 'Pomegranate')
- Gold Nail Varnish (Barry Foil Efects 'Gold')
- Teeny, Tiny Paintbrush (From Amazon) 

Picture
Paint your nails light pink and let them dry. 
Dip the brush into the pink and paint the bottom lip by creating a sort of squashed love heart. 
Picture
Then paint the top lip which is a bit like two connecting triangles. 
Picture
Finish with a few horizontal gold stripes, and you're all set! 

As usual; super easy and very cute!
If you give these a go, make sure to tag me using #abibailey or #nailartnut 


Thanks for reading and I'll see you tomorrow with another tutorial! 


Abi xxx

0 Comments

Valentine Roses | Valentine's Day Nail Art Tutorial 

11/2/2015

0 Comments

 
Hello Everyone! 
Today is the first of my Valentines Day nail art tutorials! 
Today it is these 'Valentine Roses'
Picture
You will need: 
Picture
- Light Pink Nail Varnish (Barry M 'Strawberry Icecream')
- Pink Nail Varnish (Barry M Gelly Hi-Shine 'Pomegranate')
- Green Nail Varnish (Barry M 'Spring Green')
- Black Acrylic Paint (from Amazon for £2ish, or any craft shop) or Black Nail Varnish 
[Acrylic paint is thinner so it won't string like some black nail varnishes]
- Teeny, Tiny Paintbrush (also from Amazon, also very cheap)

Picture
Paint your nails light pink and let them dry. 
Using the brush of the pink nail varnish, make random blobs on the nail, they shouldn't be neat. 
Picture
Using the teeny, tiny brush dipped in the green nail varnish, make little leave shapes around the blobs (roses). 
Picture
Picture
Picture
Again, using the teeny, tiny brush, make random swirls with the black paint, to look like the petals. 
Then you're done! It's looks like lots of steps but they're quite simple. 

I love doing roses, they're one of my favourite nail art designs to do because they look so pretty and they're so easy to do. 

If you recreate these, make sure to tag me using #abibailey or #nailartnut, I'd love to see them. 

See you tomorrow with another nail art tutorial! 

Abi xxx
0 Comments

Stag's Head | Christmas Nail Art Tutorial

17/12/2014

0 Comments

 
Hello everyone! 
This week's tutorial is of this stag's head. Not particularly Christmassy, but festive all the same. 
Picture
You wil need:
- A base colour, I chose white but apparently didn't feel like photographing it! (Sinful Colours 'Snow Me White')
- Red Nail Varnish (Miss Sporty Lasting Colour) 
- A Thin Paintbrush 

Picture
Picture
Start by making a rectangle on the bottom half of the nail, then add a semi circle below it to create the stag's head. Fill them in. Leave lots of room at the top of the nail for the antlers. 

Picture
Next, round off the top of his head and give him little ears. 

Picture
Lastly, create the antlers. Create two curved lines, starting from the top and leaving space in the middle. 
For the little antlers, just create two lines curving towards the middle but not touching. 

And that's it! I know I say this A LOT but wasn't it easy? It's always easier to break things down into steps... That, and I don't do things that are difficult!

If you recreate this make sure to use #abibailey or #nailartnut so I can see them!

I'll be back on Sunday with a gingerbread man recipe. Yum yum!

Thanks for reading and speak to you Sunday,
Abi xxx
0 Comments

Santa's Hat | Christmas Nail Art Tutorial

10/12/2014

0 Comments

 
Picture
Hello everyone!
This week's tutorial is Santa's hat. 
As usual, it's pretty simple and I've broken it down into steps for you. 
You will need: 
Picture
- Flesh Toned Nail Varnish (Revlon Nail Art Expressionist in '330/Silhouette')
- White Nail Varnish (Sinful Colours 'Snow Me White) [DISCONTINUED IN THE UK]
- Red Nail Varnish (Miss Sporty Lasting Colour)
- Thin Paintbrush 

Let's get started!
Picture
Start by painting your nails a flesh tone colour and then paint a white stripe across the middle of the nail. 
Picture
In the space above the white stripe, fill it in with the red. 
Then using the thin paintbrush, create a curvy, upside-down triangle and make sure that the point reaches the middle of the bottom section of the nail. 
Picture
Lastly, neaten up the shape and add a white blob at the bottom of the point, to create the fluffy bobble on Santa's hat. 

That's it! If you recreate any of my nail art designs, make sure to use #nailartnut or #abibailey so I can see them! 

Thanks for reading and speak to you on Sunday, where I'll show you how I've decorated my room for Christmas. T'is the season!

Abi xxx
0 Comments

Santa's Belt Buckle | Christmas Nail Art Tutorial

3/12/2014

0 Comments

 
Hello everyone!
Here is the first Christmas nail art tutorial: Santa's Belt Buckle!
You only need three colours and one tiny brush, so it's super easy.
Let's get started. 
Picture
You will need: 
- Red Nail Varnish (Miss Sporty Lasting Colour)
- Black Nail Varnish (Striper from Primark)
- Silver Nail Varnish (Barry M Foil Effects) 
- Thin Paintbrush 

Picture
Picture
Starting with a red base, paint a black strip across the third (lower) quater of the nail. 

Once that has dried, paint a small silver line, starting from the middle of the black strip, stretching across to the right side. 

Lastly, create a silver box, going through the silver line and extending past the black strip, above and below. 


How mega easy was that?! Only two simple steps. 


I think this makes a nice accent nail and would look fab paired with the next nail art design I have lined up... Keep your eyes peeled over here and on my nail art instagram! 


I'll be back with another blog post on Sunday. 
As always thanks for reading and speak to you soon!
Abi xxx
Picture
0 Comments

Gold Glitter Chevrons | Nail Art Details 

20/11/2014

0 Comments

 
Picture
Hiya!
These are the details for the 'Gold Glitter Chevrons' nail art that you might have seen on my nail art Instagram (@nailartnut). 
It's approaching Christmas time so I'm starting to get festive and play around with glitter a bit more plus I was dying to use my new chevron stencils!

Here's what I used:
- Sally Hansen Maximum Strength 
- Miss Sporty Lasting Colour in either 3294 or 160 (I'm not sure which number is the colour) 
- Chevron stencils from She Sells Seashells (see last blog post here)
- Barry M Aquarium Collection in 'Treasure Chest' 


Speak to you on Sunday!
Abi xxx
0 Comments

Spider Nail Art Tutorial

26/10/2014

0 Comments

 
Here's what you'll need:
Hello everyone!
I have another nail art tutorial for you today (sorry if you're getting bored of them, my blog will be back to normal soon!) 
Today is this incy wincy Spider, you need very little to create him! Let's get started. 
Picture
Picture
- White Nail Varnish (Sinful Colours 'Snow Me White')
- Black Striper/Nail Varnish (From Primark)
- Dotting Tool (or Bobby pin)

Picture
Using the black striper, draw a line from the top of the nail, down to the middle. 
Next, using the dotting tool and the black, make a large dot at the end of the line. 
Picture
Make a smaller dot directly below the dot you just made, overlapping it slightly. 
Picture
Using the striper, create the four smaller, inside legs. 
Picture
Lastly, create the last four legs, starting from the middle of the spider's body. 

There we go, looks a bit tricky but isn't too bad. 
Picture
I created this spider web by drawing four diagonal lines from one corner and linking them with little 'U' shapes. 
Picture
Also how cute are these cupcakes that my sister made and decorated?! So simple, yet so effective (and very tasty) 


That's it from me today! As usual if you recreate these make sure to tag them with #NailArtNut and/or #AbiBailey, I'd love to see them! 


I'll probably speak to you in the middle of the week with another tutorial, I'm not sure yet, otherwise it'll be Sunday like usual!


Thanks for reading!
Abi xxx
0 Comments

Jack O' Lantern Nail Art Tutorial

22/10/2014

0 Comments

 
Hello everyone! 
Ooh a mid week blog post, how sneaky...
I'm going to post the tutorial today as Halloween is creeping (get it?) up on us and I have a lot of designs I want to share with you before the occasion is over. 
This design is so quick and simple but looks really effective! Let's get going. 

Picture
Here's what you'll need:
Picture
- Orange Nail Varnish (Barry M 'Block Orange')
- Brown Nail Varnish (Barry M 'Paprika')
- Black Nail Varnish (with a tiny brush) or Striper
- Long thin paintbrush
Totally optional:

- Glow In The Dark Nail Varnish (from Topshop last year)
Picture
Start with an orange base (and a couple of coats of glow in the dark nail varnish if you're feeling fancy) and use your long thin paintbrush to create two lines vertically down the nail to add texture. 
Picture
Create three triangles for the eyes and nose holes. 
Picture
Lastly create an upside down crown shape for the mouth (or come up with your own, much better shape)
Picture
Voila! Said it was easy, didn't I?
Looks pretty good in the dark too!

Don't forget to tag me if you recreate this! I'd love to see them. :) 
#nailartnut #abibailey

Thanks for reading and hopefully speak to you on Sunday!
Abi xxx
0 Comments

Pink With White Daisies | Nail Art Details

10/9/2014

0 Comments

 
Picture
Hello everyone!
These are the details for these cute daisies.

- Essie 'Madison Ave-Hue'
- Primark White Striper
- NYC 'Electric Yellow'
- Sally Hansen 'Double Duty Base & Top Coat'
 
I was going to do these around spring time, but they're so pretty I couldn't wait!

Thanks for reading, 
Abi xxx
0 Comments

Grey and White, Dots and Stripes | Nail Art Details

4/9/2014

0 Comments

 
Picture
Hello Everyone!
Here are the details for this grey and white, nail art look.


- Barry M 'Grey'
- White Striper/Dotting Tool from Primark

I also used a dotting tool dipped into some white nail varnish because the dotting tool is a bit unpredictable on the the striper/dotting tool duo!

This is incredibly easy to do so it seems a bit silly to do a blog post about it but I'mma do it anyway!

(I need to cool it with the exclamation marks)

Speak soon! 
Abi xxx
0 Comments

Tiny Polka Dots and Little Gems | Nail Art Details

8/8/2014

0 Comments

 
Picture
Hello everyone! 
As promised here are the details for my latest nail art design.  

- Essie 'Madison Ave-Hue'
- White Striper/Dotting Tool from Primark
- Little Tear Shaped Gems from a gem wheel I bought in Primark a while ago 
- Sally Hansen 'Double Duty Base & Top Coat' (for shine and to adhere the gems)
- A wooden skewer dipped in a tiny bit of top coat to help place the gems

Talk to you on Sunday! 
Abi xxx
0 Comments

Paint Drips, Diamond and Yin/Yang Nail Art Details

1/8/2014

0 Comments

 
Picture
Hello everyone!
I know it's not my usual blog post day, but I feel like once a week isn't enough, and I'd like to blog more so I thought that each time I do a new nail art design, instead of just posting it on my nail art Instagram, I'd post it here too, along with the details of what I used etc! That sentence needed full stops!

For this nail art, I used:
- Barry M 'Strawberry Icecream'
- Barry M 'Blue Moon'
- Sinful Colours 'Snow Me White'
- Black and white stripers from Primark
- Dotting tool with a large end and a smaller end
- Sally Hansen 'Double Duty Base & Top Coat'
- Matte Top Coat from Primark


If you'd like any other details or have any questions, feel free to leave a comment!


I shall speak to you on Sunday,
Abi xxx
0 Comments
    Abi Bailey
    Follow
    Hello Everyone!
    Thank you for visiting my blog; I post about beauty and lifestyle. Have a read and let me know what you think.
    All my social networks are at the top if you want to keep up with my daily life!
    Abi xxx
    Submit

    Archives

    September 2016
    August 2016
    July 2016
    June 2016
    May 2016
    April 2016
    March 2016
    February 2016
    January 2016
    December 2015
    November 2015
    October 2015
    September 2015
    August 2015
    July 2015
    June 2015
    May 2015
    April 2015
    March 2015
    February 2015
    January 2015
    December 2014
    November 2014
    October 2014
    September 2014
    August 2014
    July 2014
    June 2014
    April 2014
    March 2014
    February 2014
    January 2014
    December 2013
    October 2013
    September 2013

    Categories

    All
    5 Things Friday
    Advice
    Baking
    BEAUTY
    Beauty Favourites
    Birthday
    Blog
    Bloglovin
    Christmas
    Day Out
    DIY
    Easter
    Family
    Fashion
    First Entry
    Glossybox
    Goals
    Hair
    Halloween
    Lifestyle
    Make Up
    Nail Art
    Nail Art Details
    Nailartnut
    New Year
    Ootd/ootn
    Recommendations
    Review
    Shopping/Haul
    Skincare
    Tutorial
    Valentine's Day

Powered by Create your own unique website with customizable templates.