AbiJBailey
  • Blog
  • About Me
  • Twitter
  • Instagram
  • Nail Instagram
  • Pinterest

A Year In Review...

28/12/2014

0 Comments

 
Hello everyone!
This is the last blog post of the year, can you believe 2014 is nearly over? 
What a year it's been, thinking back, a lot happened. 
I went to a lot of parties, met a lot of new people and finished college despite hating it with every fibre of my being. I nearly worked for Visa, I fretted about the decision not to go to uni, I got the job at Debenhams and really enjoy it. I made new friends, I became more independent and now I earn my own money, and I think most importantly, I really developed as a person. 
It's been a very developmental year. I learnt to trust my judgement and that sometimes, being a little bit stubborn works in your favour and I learnt that following the masses isn't necessary to be happy. 

As you know, I don't do resolutions, I do 'Goals'. These were my goals for 2014:
1) 'Get a Job' check. 
2) 'Learn to Drive' haven't completed that one but I'm working on it and it'll be added to next year's goals
3) 'Try Harder at College' well I completed college with semi decent results, so I'm going to say that's a goal completed. 
4) 'Take More Photos' I think I've achieved this, purely for the sake of this blog. I like taking photos. 
5) 'Be Less Judgemental' it's easy to make a snap judgement about someone- we all do it- but sometimes a person is having a bad day and makes a bad impression. Try not to judge someone until you get to know them, we all have 'off' days. I like to think I've been a bit more compassionate this year. 
6) 'Try More Things' as someone who isn't a fan of change, saying 'no' or backing out comes quite easy to me, but I've tried to shake that mentality and become a bit braver. Even if it just means looking confident even though you're shaking inside. You'll start to feel more confident. 

I know everyone hates the phrase "New Year, New Me" because 'you can make a change any time of the year' but a new year is a good time to make a change. It's a completely fresh start, filled with new months and new challenges and adventures. It's a clean slate. 

I'm going to try and make 2015 a 'me' year. I don't mean be more selfish, I just mean I need to do more things that make me happy and get to a place where I'm really happy with who I am, both inside and out. 
I feel like 2015 will be a good year, I have a lot of faith in it. 
Picture
Photo source
Do you have any goals for 2015? Was 2014 good to you? 


As always, thanks for reading and speak to you soon, 
Abi xxx 
0 Comments

Stag's Head | Christmas Nail Art Tutorial

17/12/2014

0 Comments

 
Hello everyone! 
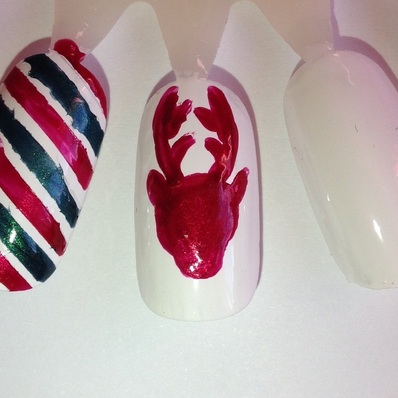
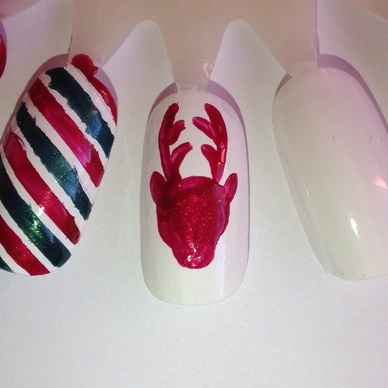
This week's tutorial is of this stag's head. Not particularly Christmassy, but festive all the same. 
Picture
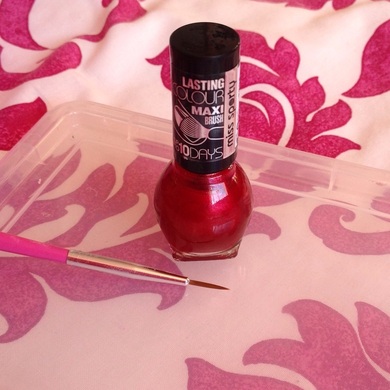
You wil need:
- A base colour, I chose white but apparently didn't feel like photographing it! (Sinful Colours 'Snow Me White')
- Red Nail Varnish (Miss Sporty Lasting Colour) 
- A Thin Paintbrush 

Picture
Picture
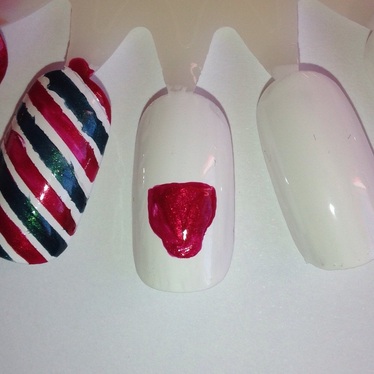
Start by making a rectangle on the bottom half of the nail, then add a semi circle below it to create the stag's head. Fill them in. Leave lots of room at the top of the nail for the antlers. 

Picture
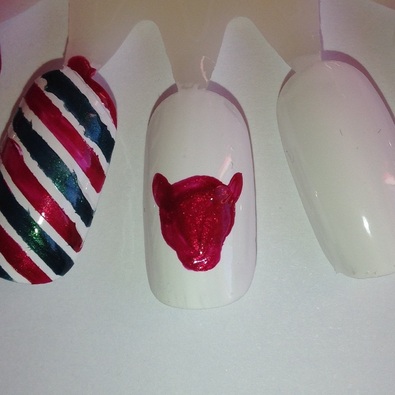
Next, round off the top of his head and give him little ears. 

Picture
Lastly, create the antlers. Create two curved lines, starting from the top and leaving space in the middle. 
For the little antlers, just create two lines curving towards the middle but not touching. 

And that's it! I know I say this A LOT but wasn't it easy? It's always easier to break things down into steps... That, and I don't do things that are difficult!

If you recreate this make sure to use #abibailey or #nailartnut so I can see them!

I'll be back on Sunday with a gingerbread man recipe. Yum yum!

Thanks for reading and speak to you Sunday,
Abi xxx
0 Comments

Decorating My Room For Christmas!

13/12/2014

0 Comments

 
Hello Everyone!
As promised, here is the blog post showing you how I've decorated my room for Christmas.
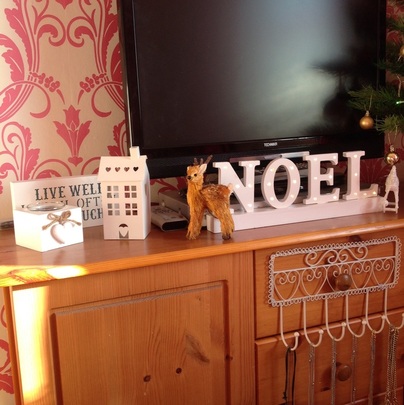
 Normally I have Christmas stuff spread throughout my room, but this year I've contained it to one area. 
Picture
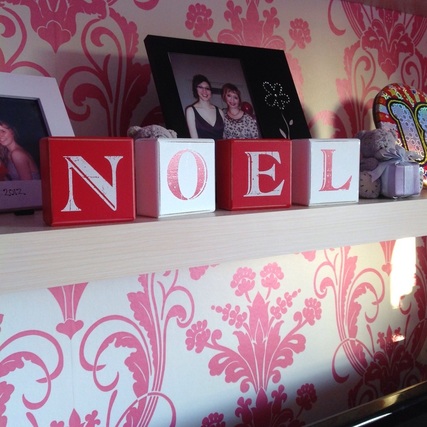
I bought these 'NOEL' blocks from Wilkos last year, I think they were only about £2.
Picture
Picture
Picture
I have a bit of an obsession with fairy lights and candles. 
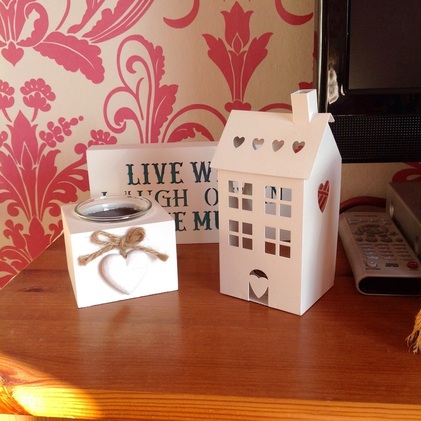
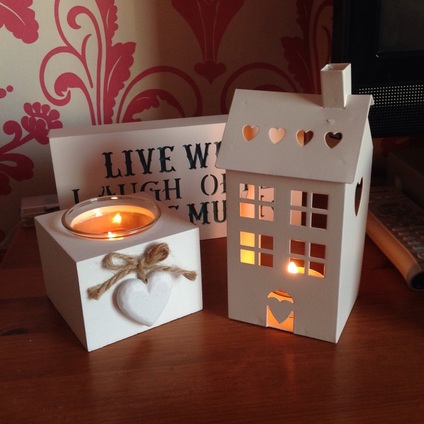
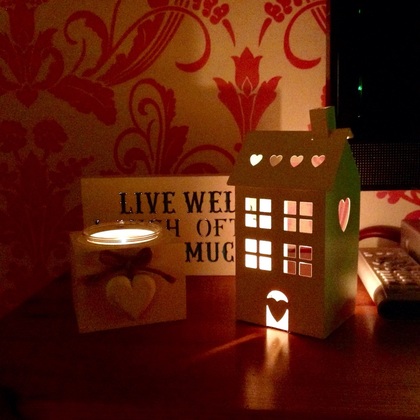
I bought the little house tea light holder in Wilkos for about £4. I think this'll look cute all year round!
The other tealight holder was a gift from my best friend for my birthday which I love! They both have a Christmassy scent and they sit in front of a lovely plaque that reads "live well, laugh often, love much" which was a gift from my other friend for my birthday. 
Picture
Picture
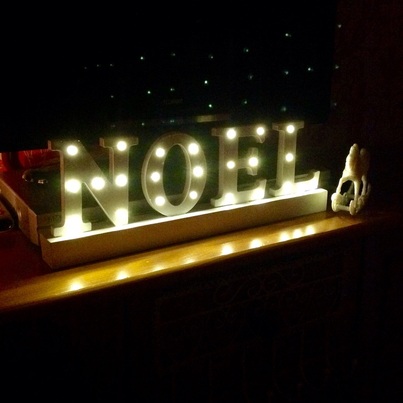
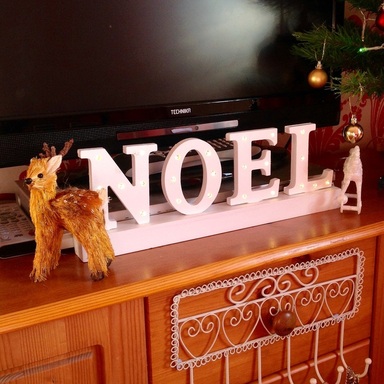
I bought this light up 'NOEL' sign from Home Bargains for £4 and it's so bright! I really like it. It looks a bit scrappy in the daylight but once its switched on you can't see the imperfections. 
Picture
Picture
Picture
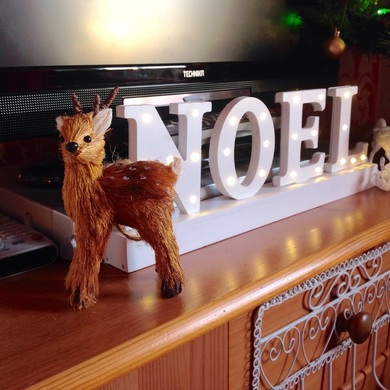
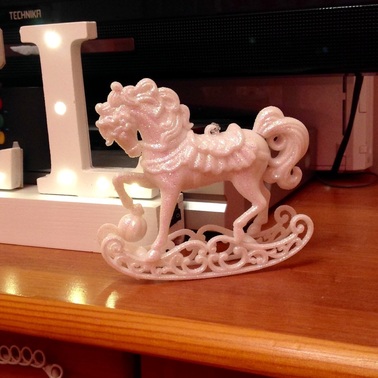
Either side of my light up 'NOEL' sign, sits my decoration that I got last year and the new decoration I got this year. 
Picture
Picture
Picture
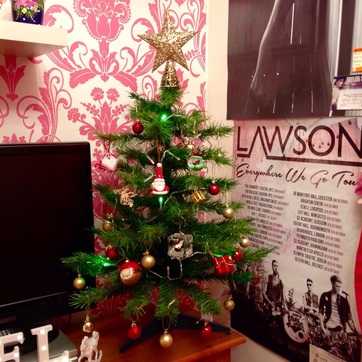
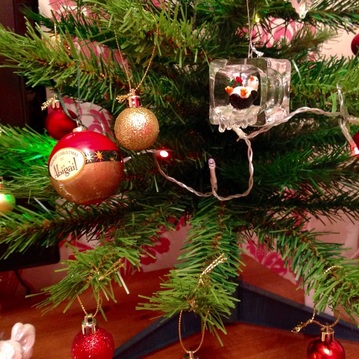
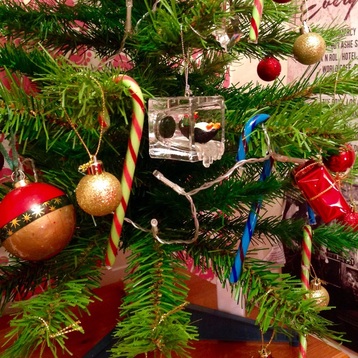
Lastly is my little Christmas tree! It features some of the decorations I've got each year from the Avenue Garden Centre, a few little red and gold baubles and some multi coloured lights. I've recently added some fruity candy canes that I jad forgotten I'd bought, not very traditional but they look fab! 
The star on top is the perfect size! 


That's all for today, do you celebrate Christmas? If so, do you have a favourite decoration?


Thanks for reading, check out my social media links and I'll speak to you soon!


Abi xxx
0 Comments

Santa's Hat | Christmas Nail Art Tutorial

10/12/2014

0 Comments

 
Picture
Hello everyone!
This week's tutorial is Santa's hat. 
As usual, it's pretty simple and I've broken it down into steps for you. 
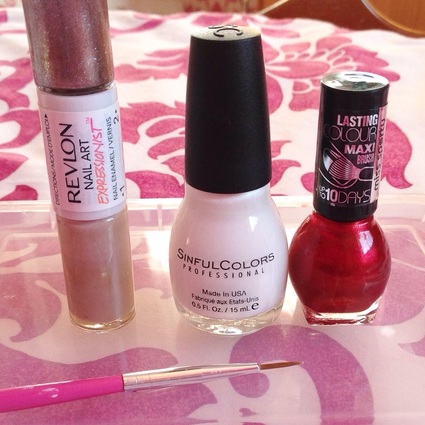
You will need: 
Picture
- Flesh Toned Nail Varnish (Revlon Nail Art Expressionist in '330/Silhouette')
- White Nail Varnish (Sinful Colours 'Snow Me White) [DISCONTINUED IN THE UK]
- Red Nail Varnish (Miss Sporty Lasting Colour)
- Thin Paintbrush 

Let's get started!
Picture
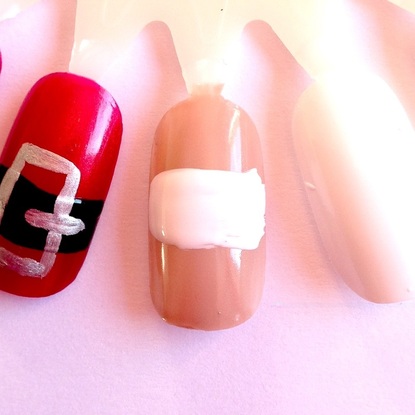
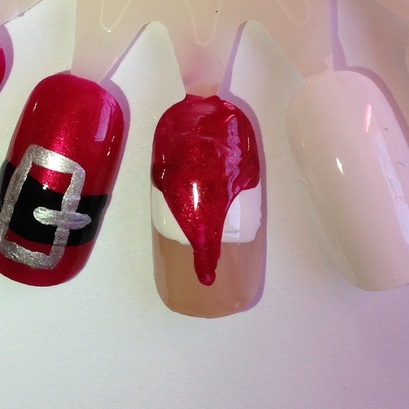
Start by painting your nails a flesh tone colour and then paint a white stripe across the middle of the nail. 
Picture
In the space above the white stripe, fill it in with the red. 
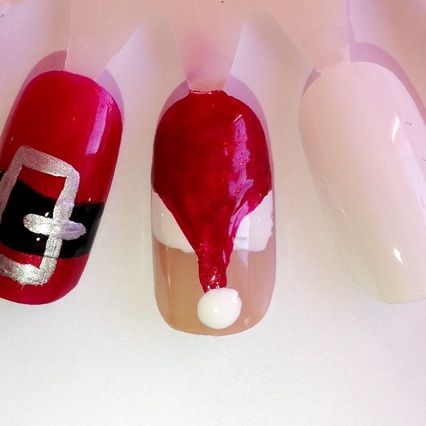
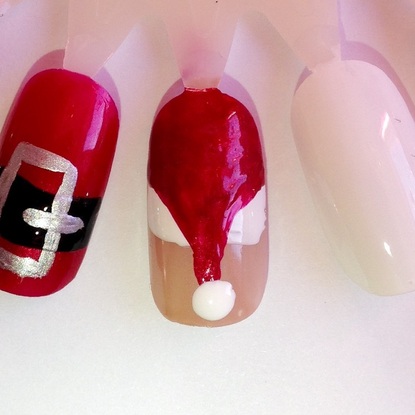
Then using the thin paintbrush, create a curvy, upside-down triangle and make sure that the point reaches the middle of the bottom section of the nail. 
Picture
Lastly, neaten up the shape and add a white blob at the bottom of the point, to create the fluffy bobble on Santa's hat. 

That's it! If you recreate any of my nail art designs, make sure to use #nailartnut or #abibailey so I can see them! 

Thanks for reading and speak to you on Sunday, where I'll show you how I've decorated my room for Christmas. T'is the season!

Abi xxx
0 Comments

Santa's Belt Buckle | Christmas Nail Art Tutorial

3/12/2014

0 Comments

 
Hello everyone!
Here is the first Christmas nail art tutorial: Santa's Belt Buckle!
You only need three colours and one tiny brush, so it's super easy.
Let's get started. 
Picture
You will need: 
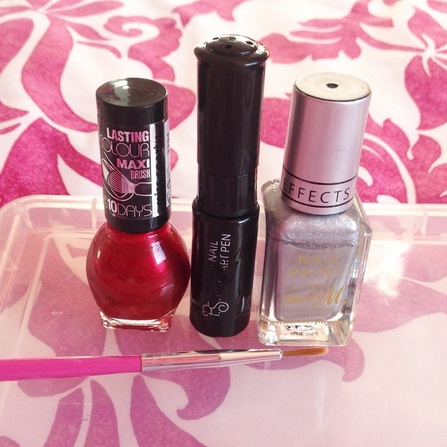
- Red Nail Varnish (Miss Sporty Lasting Colour)
- Black Nail Varnish (Striper from Primark)
- Silver Nail Varnish (Barry M Foil Effects) 
- Thin Paintbrush 

Picture
Picture
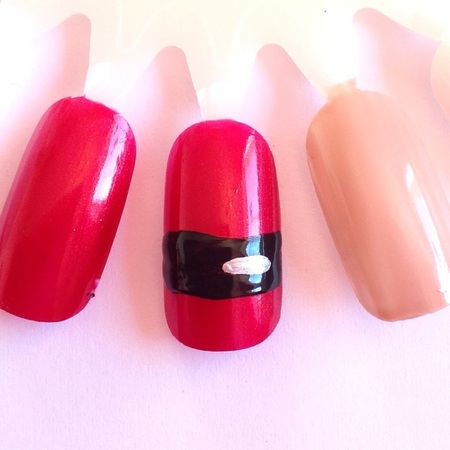
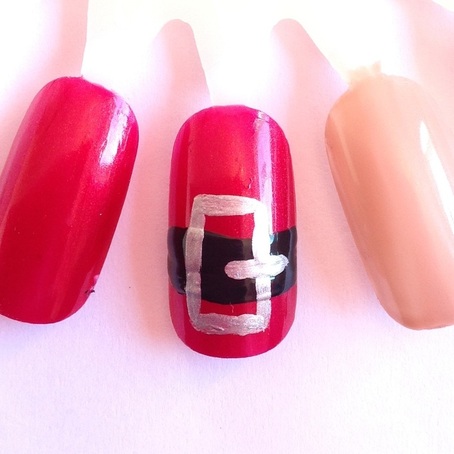
Starting with a red base, paint a black strip across the third (lower) quater of the nail. 

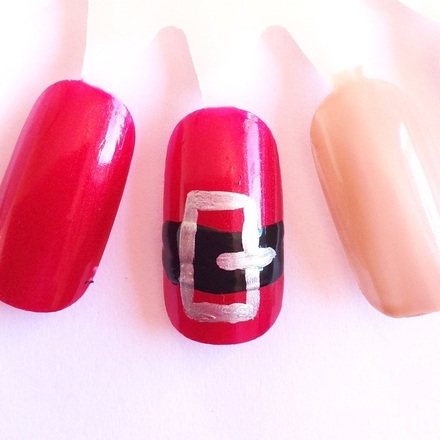
Once that has dried, paint a small silver line, starting from the middle of the black strip, stretching across to the right side. 

Lastly, create a silver box, going through the silver line and extending past the black strip, above and below. 


How mega easy was that?! Only two simple steps. 


I think this makes a nice accent nail and would look fab paired with the next nail art design I have lined up... Keep your eyes peeled over here and on my nail art instagram! 


I'll be back with another blog post on Sunday. 
As always thanks for reading and speak to you soon!
Abi xxx
Picture
0 Comments
    Abi Bailey
    Follow
    Hello Everyone!
    Thank you for visiting my blog; I post about beauty and lifestyle. Have a read and let me know what you think.
    All my social networks are at the top if you want to keep up with my daily life!
    Abi xxx
    Submit

    Archives

    September 2016
    August 2016
    July 2016
    June 2016
    May 2016
    April 2016
    March 2016
    February 2016
    January 2016
    December 2015
    November 2015
    October 2015
    September 2015
    August 2015
    July 2015
    June 2015
    May 2015
    April 2015
    March 2015
    February 2015
    January 2015
    December 2014
    November 2014
    October 2014
    September 2014
    August 2014
    July 2014
    June 2014
    April 2014
    March 2014
    February 2014
    January 2014
    December 2013
    October 2013
    September 2013

    Categories

    All
    5 Things Friday
    Advice
    Baking
    BEAUTY
    Beauty Favourites
    Birthday
    Blog
    Bloglovin
    Christmas
    Day Out
    DIY
    Easter
    Family
    Fashion
    First Entry
    Glossybox
    Goals
    Hair
    Halloween
    Lifestyle
    Make Up
    Nail Art
    Nail Art Details
    Nailartnut
    New Year
    Ootd/ootn
    Recommendations
    Review
    Shopping/Haul
    Skincare
    Tutorial
    Valentine's Day

Powered by Create your own unique website with customizable templates.