AbiJBailey
  • Blog
  • About Me
  • Twitter
  • Instagram
  • Nail Instagram
  • Pinterest

Rimmel 'Lasting Finish' Concealer Review | 5 Things Friday

22/5/2015

4 Comments

 
Hello everyone!
Happy Friday!
I've bought a lot of stuff recently so expect a few hauls and review blog posts coming up. 
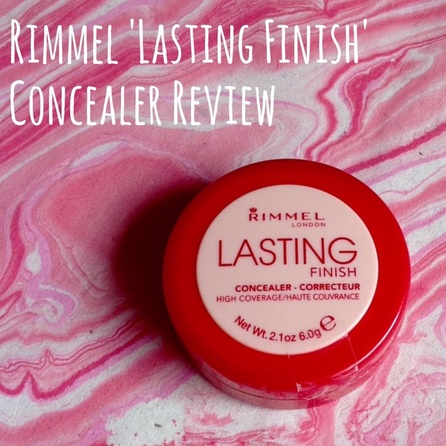
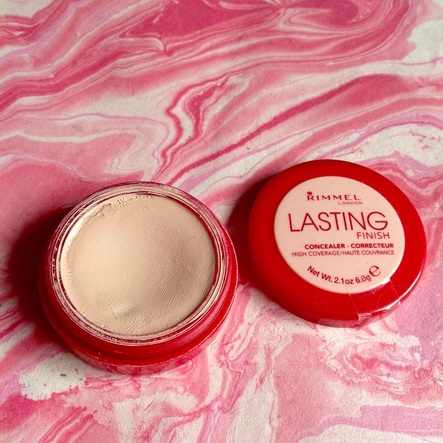
Today I'm reviewing the Rimmel 'Lasting Finish' Concealer. 
Rimmel 'Lasting Finish' Concealer Review

Coverage

Rimmel 'Lasting Finish' Concealer Review
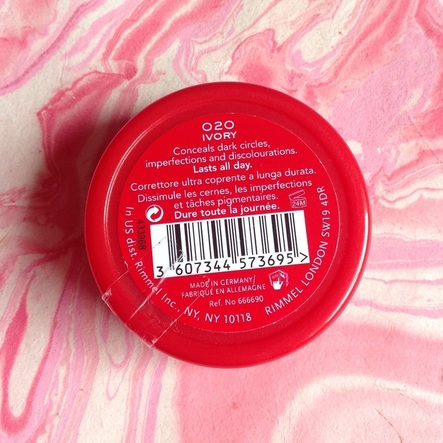
I wear shade 020/Ivory and have oily skin. 
It claims to be high coverage and conceal dark circles, imperfections and discolouration. 
I agree with all of those statements; it doesn't completely erase my dark circles but it definitely lessens them. It covers redness excellently and it covers blemishes really well too, especially as it's a creamy consistency so it doesn't cling to dry spots. 

Pigment

Rimmel 'Lasting Finish' Concealer Review
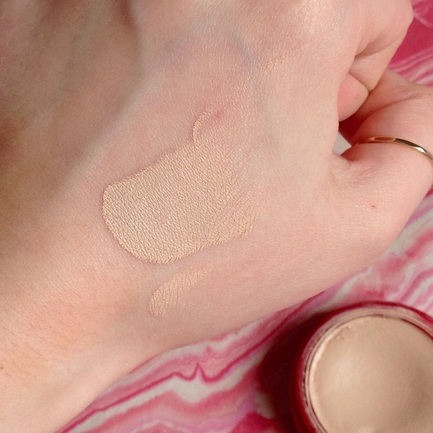
The pigmentation is lovely, it's not too yellow or too pink.
It's a available in three shades- Porcelain, Ivory and Warm Beige 
Porcelain looks to be more yellow toned, compared to Warm Beige which is more pink toned. 

Blendability

Rimmel 'Lasting Finish' Concealer Review
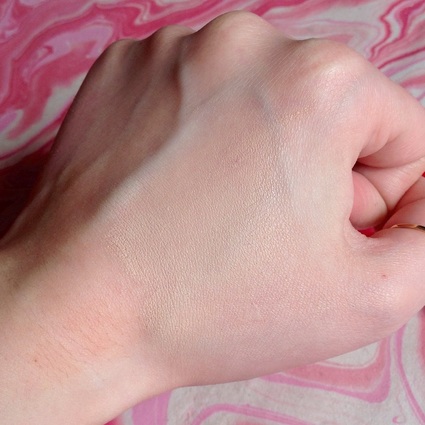
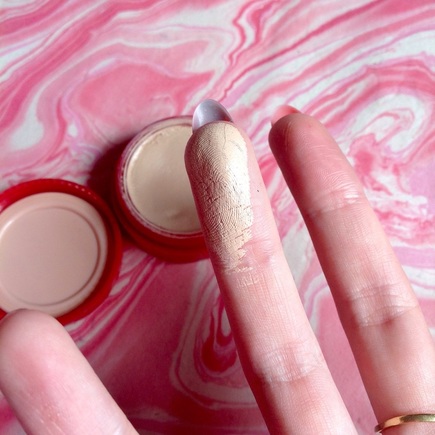
It blends really smoothly, again due to the creamy consistency. I apply it with my finger and blend it with my finger, I then soften it with my foundation brush. 
It doesn't lose all of it's coverage or pigmentation, once you've blended it, either. 

Wear

Rimmel 'Lasting Finish' Concealer Review
It claims to last all day and I agree with that.  It varies from day to day, but I tend to have my make up on for around 15 hours a day, and it sits nicely, doesn't feel thick or cakey and it doesn't rub off. 

Price & Novelty

Rimmel 'Lasting Finish' Concealer Review
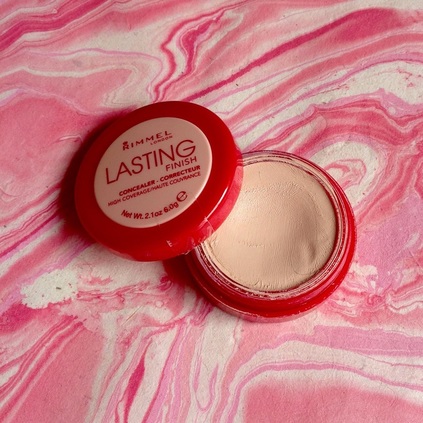
It costs £5.49 and I love that it comes in a pot! 
It's not like the creamy concealers that come in a stick, as I find those quite greasy and they just rub off instantly. It has the coverage of a stick concealer but the consistency/staying power of a liquid concealer. 
I've been using this for about six weeks and I've hardly made a dent so I think it will last ages.
I like that it has quite a big surface area too, so you can pick up a lot of product at once, saving time. 
I'm not too keen on the packaging, I think it looks a bit cheap, but it has a nice tight seal so it won't dry out! 

Overall I really love this concealer! I bought it on a whim because I wanted to try something new and my regular concealer was running out. It's also the matching concealer to my foundation. 
I didn't expect to love it as much as I do!


Have you tried this concealer? What do you think of it?
Leave me a comment!


Thanks for reading and I'll speak to you on Sunday,
Abi xxx
4 Comments

How I Achieve Long, Thick Lashes

17/5/2015

0 Comments

 
Hello Everyone!
Happy Sunday to you!

As promised, today I'm going to show you how I get long, thick, fluttery lashes.
No false lashes, lash extensions or growth serums needed. 
How I Achieve Long, Thick Lashes
To achieve this, I use three mascaras. I know to some people that seems like a lot, but I LOVE mascara; if I could only have two beauty products, it'd be mascara and lipstick. 
The three I used are:
Maybelline 'Lash Sensational' £7.99, L'Oreal 'Miss Manga' £8.99 and Rimmel 'Wonder'Full' £7.99
I'll go into more detail about them at each step. 
Maybelline Lash Sensational Mascara
How I Achieve Long, Thick Lashes
I love Lash Sensational, it has a spoon-shaped brush to catch all the little lashes and if you use the other side, it helps to separate your lashes further. It has a really black pigmentation too and the formula is wet but not too wet, so you can build coats easily, without it clumping or just getting wiped off. 
The first step is to coat your lashes with a few coats of Lash Sensational to lengthen and define your lashes. Look at the difference with just a few coats compared to bare lashes. 
P.s. please ignore my brows, they were NOT on point that day. 
Rimmel Wonder'Full Mascara
How I Achieve Long, Thick Lashes
When I first used Wonder'Full, I really didn't like it, I thought the formula was too wet and it didn't make any sort of impact. It sat in my draw for a few weeks before I thought to use it again and I'm glad I did! It had dried up a tiny bit which made all the difference. 
The brush has lots of little bristles and gives you a really natural look, perfect for 'no make up make up'. 
This is the second step, to further define and separate the lashes, I apply lots of Wonder'Full. 
In this photo I have a lots of coats of Lash Sensational and Wonder'Full on the left and lots of coats Lash Sensational on the right.  Even though Wonder'Full is a defining mascara, do you see how it's thickened the lashes?
L'Oreal Miss Manga Mascara
How I Achieve Long, Thick Lashes
I was never that interested in Miss Manga, it just never drew me in, but my mum bought me one and I tried it and was pleasantly surprised. Lovely volumising mascara. It's a bit drier than the other mascaras but still wet enough to prevent clumping. 
Here on the left I have Miss Manga on, compared to the right with just Lash Sensational and Wonder'Full. 
That's the final step; to apply lashings (haha) of Miss Manga to add real volume and impact. 
How I Achieve Long, Thick Lashes
Here's the end result! Apologies for the poor lighting! 
Picture
Picture
I just keep repeating the steps until I get the length and volume I am looking for. 
I would say these are my holy grail mascaras at the moment, I really suggest getting one (or all three) of them if you haven't got them already! 


Have you tried these mascaras? What do you think of them?
Are there any mascaras you think I need to try?
Leave me a comment!

Thanks for reading and I shall speak you on Friday! 

Abi xxx
0 Comments

Nail Art Nut's 2nd Birthday!

13/5/2015

0 Comments

 
Hello everyone!
Today marks the second anniversary of my nail art Instagram!

I created a second Instagram because I had become so obsessed with nail art, I was posting them to my regular Instagram about twice a week! So it made sense to have a dedicated nail art Instagram. 
This is what my nail art Instagram looked like the day I created it and how it looks today!

Picture
Picture
I've also put together a collage of all the nail art designs I have created over the past two years, that's 144 photos! 
Picture
You can view them all individually over on my nail art Instagram which is linked at the top of my blog and the top of this post. 


Nail Art Nut led to a huge hobby of mine and led to the creation of this blog!
I like to think I've improved a lot over the past two years, the top left box holds the first nail art designs I posted and the bottom right holds the most recent designs I've created. 
I think the most important thing I've learnt is not to filter the photos, haha!

Thank you to everyone who follows me and to everyone who supports me. It means the world ❤️
Here's to another year of Nail Art Nut!

Speak to you again on Friday!

Abi xxx


P.s. sorry about all the exclamation marks, I'm excited. 
0 Comments

Butterfly Wing Nail Art Tutorial

10/5/2015

0 Comments

 
Hello everyone!
Happy Sunday to you.
I have another nail art themed blog post today; this butterfly wing nail art tutorial. 
On Wednesday, it'll be my nail art instagram's second birthday! 
Butterfly Wing Nail Art Tutorial

You Will Need

Butterfly Wing Nail Art Tutorial
- A Base Colour, I chose orange, but an ombré would look incredible, I just didn't have time.  (Barry M 'Block Orange')
- Black Nail Varnish (Barry M 'Black')
- White Nail Varnish (Sinful Colours 'Snow Me White')
- A Surface To Drop Paint On
- A Dotting Tool (Large End & Small End)
- A Long, Thin Paintbrush

Method

Butterfly Wing Nail Art Tutorial
Start by painting a curved line from the top of the nail, down to about one third of the nail on the opposite side. 
Butterfly Wing Nail Art Tutorial
Next, paint three straight lines starting at even intervals across the first line you painted. 
Butterfly Wing Nail Art Tutorial
Leaving space at the bottom of the nail, connect the three straight lines with curved lines. 
Butterfly Wing Nail Art Tutorial
Using the large end of the dotting tool, fill in the bottom of the nail. 
Butterfly Wing Nail Art Tutorial
(I sprayed it with quick dry spray, so that's why it looks gooey). Using the large end of the dotting tool, dipped in white, create two dots. 
Butterfly Wing Nail Art Tutorial
Fill in the remaining space using the smaller end of the dotting tool.
Butterfly Wing Nail Art Tutorial
When I created this on my acrylic nails, I used a Barry M Nail Art Pen (which made it so much easier, I strongly suggest you get one!) and I just used the smaller end of the dotting tool. 


It is a little bit fiddly, especially doing it on your own nails, but I think they're really pretty and definitely worth the effort. 


I'm hoping to do a tiny blog post on Wednesday to commemorate Nail Art Nut's second birthday, but it's the night I work late so I'll have to see!
Otherwise I'll speak to you on Friday for another 5 Things Friday blog post. 


Thanks for reading!


Abi xxx
0 Comments

Top 5 Nail Art Starter Items | 5 Things Friday

8/5/2015

0 Comments

 
Hello Everyone!
A happy Friday to you! 
I did a post similar to this when I first started blogging a year and a half ago, but I have since improved and I think this is much more concise. 

Picture

Make Up Sponges

Make up sponges
Perfect for sponging on colour to create ombrés or gradients. I bought a big pack for £1 from Primark.

Nail Glue

Elegant Touch Brush On Nail Glue
Nail glue has many uses; it can be used for sticking on fake nails, applying gems or studs and sometimes I use it if my nail tears and I don't want it to rip off! Just put a blob over the tear. 
I love this brush on nail glue, I buy it from Superdrug for £3.08. 

Striping Tape

Striping Tape
I bought mine from Amazon years ago, and you tend to get lots of rolls in a pack in different colours. It's super cheap and it'll last you forever, I'm nowhere near finishing a roll yet. You can use it to create stripes by placing it on dry painted nails or you can use it to create clean, straight lines, by placing it on your nail, painting over it and pulling it off with tweezers. 

Dotting Tools

Dotting Tools
Definitely worth having. You can easily buy them on Amazon. Sure, using tooth picks and Bobby pins is fine, but you get much better results using the proper tools, plus they're not expensive and you feel more sophisticated using them (well, I do anyway). 

Nail Art Brushes

Nail Art Brushes
Did you know that these are also super cheap and available on Amazon? Because they are (Haha).
These are perfecto for painting really thin, long lines and little details. 


Did you find this helpful? 


What beauty or nail art tool do you find essential? 
Leave me a comment letting me know!


Thanks for reading! I'll speak to you on Sunday,
Thank you to those who have cast their vote in the survey, it's just in my sidebar if you were interested!


Abi xxx
0 Comments

Starting A Blog? | Tips & Advice

3/5/2015

0 Comments

 
Hello Everyone! 
Happy Sunday to you!
I had to work today (boo), I have tomorrow off though (woo!)

Today I thought I'd share with you my thoughts, tips and advice for starting a blog.
Maybe it's something you've been thinking about but don't know where to start. 
That's why I'm here to help!
Starting a blog? Tips & advice
Anyone can blog. 
If you're passionate about something, you can blog about it. 
My first bit of advice is to research all the different blogging platforms, e.g. Weebly, Blogger, Wordpress, and see what they have to offer and what you're looking for. 

I use Weebly, which I really like and think is perfect for beginners, but I've been blogging for a year and a half now and there are features I want that Weebly just doesn't offer. Things like 'related content' widgets and things that would really improve my blog and make it more user friendly. At some point I'll probably look into changing platforms unless Weebly up their game *cough* hint hint Weebly *cough*. 

Plan ahead.
Blogging is so much easier if you've planned ahead. You don't even need a detailed plan, just jot down a few ideas that you could write confidently about so that when it comes to actually writing and posting, you're not sat there staring blankly at a screen. 
Maybe set a schedule for when you want to post, I do my 5 Things Friday mini post on Fridays and my regular blog post on Sundays. That way, I know when I need to have an idea by, and when to have the photos sorted. It also means your readers know when to return to read more of your fabulous content!

Don't try to do everything on the day. 
Unless you have endless amounts of free time. Like I said, plan ahead and then take a day to take photos for that blog post. Then find time to pick your best photos and edit them if you feel like it. That way when it comes to putting the post together, you've only got to write it and drop in the photos. I work 30 hours a week so this makes blogging much more manageable. 

Use photos.
Photos break up a lot of text and make everything look pretty. It also means you can post a select photo or two to post to Instagram and Twitter etc. 
Make your photos large. No one wants to have to squint at a tiny photo. 


Write about what makes you happy. 
Make sure you're writing for yourself, that way you'll look forward to blogging and feel more proud of what you've written. There's a niche for everything, so no matter what you write about, you'll find your audience. 
Blogging should be fun, after all.

Don't do it just to be popular.
Sure it'd be nice to have a huge following and be the next Zoella, but that shouldn't be why you start a blog. There's no guarantee that you'll soar to the top (although there's nothing stopping you either!). 
Do it to make yourself proud and to get what you set out to achieve.  For me, it was to boost my confidence, and find myself again. I'd had a rough year and decided that it was time to do something very different to bring me out of my shell. 

Join lots of social networks. 
The more social networks you're with, the more exposure your blog can get.
Once I've posted my blog post, I tweet about it, Instagram it, Pin it (all linked at the top of my blog!) and even post it on my tumblr. I'm also on bloglovin which I love, because you can see everyone you follow's latest blog posts in one place, rather than having to go to their individual blogs. I seriously suggest joining it. 

 If you'd like, you can follow me on bloglovin here.

I have a Facebook but I don't post on there purely because I don't want to plague my family with it, and I'm friends with lots of people from school and work, most of whom I just don't want to know about this blog! 
Certain 'friends' left nasty comments as 'a joke' when I started out, and I just don't want to encourage that sort of behaviour!

Lastly, just DO IT. 
Just join a blogging platform and start tapping away. 
No one's first few posts are good. That's not to say they're bad, just that you're still working on your style and finding out how to do this blogging thing. 
You improve with practice, as you would with anything. 
Also, you won't be proud of everything you write. I have a handful of posts that I hate but then I have lots of posts that I worked really hard on and am really proud of. 
Just have fun. 

Where these tips useful? 
Leave me a comment!


Thanks for reading, don't forget that the survey is still in the sidebar of my blog!


Speak to you on Friday, 
Abi xxx

0 Comments
    Abi Bailey
    Follow
    Hello Everyone!
    Thank you for visiting my blog; I post about beauty and lifestyle. Have a read and let me know what you think.
    All my social networks are at the top if you want to keep up with my daily life!
    Abi xxx
    Submit

    Archives

    September 2016
    August 2016
    July 2016
    June 2016
    May 2016
    April 2016
    March 2016
    February 2016
    January 2016
    December 2015
    November 2015
    October 2015
    September 2015
    August 2015
    July 2015
    June 2015
    May 2015
    April 2015
    March 2015
    February 2015
    January 2015
    December 2014
    November 2014
    October 2014
    September 2014
    August 2014
    July 2014
    June 2014
    April 2014
    March 2014
    February 2014
    January 2014
    December 2013
    October 2013
    September 2013

    Categories

    All
    5 Things Friday
    Advice
    Baking
    BEAUTY
    Beauty Favourites
    Birthday
    Blog
    Bloglovin
    Christmas
    Day Out
    DIY
    Easter
    Family
    Fashion
    First Entry
    Glossybox
    Goals
    Hair
    Halloween
    Lifestyle
    Make Up
    Nail Art
    Nail Art Details
    Nailartnut
    New Year
    Ootd/ootn
    Recommendations
    Review
    Shopping/Haul
    Skincare
    Tutorial
    Valentine's Day

Powered by Create your own unique website with customizable templates.